The Vanfocused Guide to Camp Coffee & Best Camping Coffee Makers

camping coffee

Making coffee while camping or on the road can be as easy as making coffee at home. Whether you are in an RV, van, trailer, car camping or in a tent, all you need is the right tools to brew the perfect cup of camping coffee, every time. 

For me, no matter where I wake up, morning coffee is a ritual and the best part of the day. The van fills up with steam first as the water slowly comes to a bubbling boil, the shrill whistle of the kettle pierces the silence and that rich coffee aroma hanging in the air is one of the best smells around.

We’ll try and cover every possible way to make coffee while camping, as well as other important coffee information. If you feel like we missed anything, please let us know in the comments.

How to Start

The Coffee Beans

No matter where you are, to make the best cup of coffee you need to start with the best bean. 

Fairtrade is essential. Sustainability is a bonus. Buy local wherever and whenever possible and once you discover your favorite bean or grind, pick up the biggest bag you can find to save on cost and packaging, much of which is unfortunately still unrecyclable.

Best Eco Friendly Coffee

Larry's Coffee (Organic, Fairtrade)

larry's fairtrade sustainable coffee brand

Larry’s Coffee is an organic, small batch coffee company that has a long record of being eco-friendly and shade-grown (which means bird friendly), as well as emphasizing fair trade and sustainability since they were founded in 1992.

Support a Van Life Coffee Company

Divine On The Roast Coffee Co.

divine on the road coffee company

This coffee company was started by a van lifer, @divineontheroad. She sells, hot kits (including an aeropress), cold kits, dark roast, espresso roast, mugs, and stickers (I’m a huge sticker nerd). Check out the details here: https://shopdivineontheroad.com/
Divine on the road coffee company
@divineontheroad

The Water

Some sushi chef’s believe that it is not the fish that makes a good sushi roll, it is the rice. Similarly, you can’t make a decent cup of camping coffee without clean, clear water.

You might choose bottled water for drinking and cooking and tank water for cleaning and washing, but all that plastic will add up quickly while camping or in a small space like a van and is completely unrealistic while doing a long backpacking trek.

Filtering water is definitely cheaper than buying it. A good water filter will allow you to collect water from streams, springs, lakes, ponds, and outdoor public taps.

Alternatively you can boil the water to sterilize it when you’re out camping or hiking, but this will do nothing for the water’s taste. 

It is so useful to have a large jug around. We use ours every single day. Once we used it to put out a fire under the bonnet! Be sure to stash some extra filters in your toolbox for many months of crisp, clear water, regardless of the source, and never worry about the quality of your drinking water again!

Alright, now let’s talk about how to make coffee without the use of your typical coffee maker.

Camping Coffee Methods

camping coffee methods

If you are anything like me, your day simply won’t start without at least two cups of coffee.

Having the best setup to make your own coffee will save time and money. A little more self-sufficiency, a little less needy, a little more prepared, a little less pricey. 

Camping coffee doesn’t have to be difficult. Whether it’s cowboy coffee, pour-over, French press or even a portable espresso machine (for those of you with camper vans or RV’s), there are many ways to brew your cup of camp coffee. Take charge of your morning to jump start your whole day!

How To Make Coffee Without a Coffee Maker

1) Instant Coffee

By and far the EASIEST way to make a cup of coffee while camping is instant coffee.

Instant coffee is the love of backpackers and thru-hikers alike. It’s portable, lightweight, and easy. In fact, some hikers don’t even bother heating it up. 

Regardless of what you think about the taste, instant coffee is an easy way to get that caffeine fix, especially if your doing any sort of backwoods camping.

Also, did you know? Instant coffee is considered more eco-friendly than other coffee preparation methods. In fact, it is said to have 1/3 the total emissions compared to drip-coffee (source).

If that isn’t enough to get your caffeine fix a-buzzin, check out these awesome instant coffee brands for your next camping trip.

Mount Hagen Instant Coffee (Organic, Fairtrade)

mount hagen instant coffee

Mount Hagen makes instant coffee that is organic and fairtrade made from 100% highland Arabica coffee beans.

Republica Instant Coffee (Organic, Fairtrade)

Republica instant coffee

Republica is yet another certified organic and fairtrade coffee company making an instant coffee out of 100% sustainably sourced Arabica coffee beans. The female-owned company also states that “At República, ethics with impact is at the very heart of our philosophy.”

2) Pour-Over Method

pour over method for camp coffee

The pour-over is very simple. Boil a kettle of water and pour it over a scoop of coffee through a strainer or coffee filter. Boom. Caffeine.

The pour-over method does require a bit of practice, however. You have to time the pouring of the water to produce a good-tasting cup of coffee.

For how simple it is there is a remarkable amount of tools and gadgets for the pour-over camp coffee method. 

Single Use Pour Over Pouches

They make single use pour over bags that look a bit similar to tea bags however you open the top to reveal the coffee grounds just ready and waiting to get that boiling water poured over them.

The downside? Well, trash really. If you’re hiking or backpacking you will need to haul away the coffee grounds, filter, and plastic. 

Kuju Coffee Single Use Pour Over

pour over coffee

Kuju states that they are ethically sourced and eco-friendly. Even though these pouches are single use, they state that the company runs off 100% wind-power. They also donate 1% of all sales to the National Park system. 

Twin Peaks Pour Over (Single-origin, Fairtrade)

twin peaks coffee pour over

Twin peaks is a popular pour over coffee blend that boasts of being single-origin, fairtrade, and non-GMO. These guys are perfect for your next camping trip.

More Traditional Pour-Over Method

If you want a more traditional approach, however, you will be able to cut down on your waste. They make a ton of different products for this, from lightweight pour-over stands for you ultralight backpacking gear-heads, to more involved car camping sets.

The added bonus of this pour-over method is that you will also be reducing cost. Those individual packets tend to have a higher CpC (Cost per Cup, a widely used term that we literally just made up). 

Ultralight Pour-Over Camping Coffee Makers

GSI Outdoors Ultralight Java Drip

GSI outdoor pour over coffee

If you are at all into outdoor gear, than you should be familiar with GSI. They make a range of camping and hiking equipment and this is their pour-over coffee product. Coming in at less than 0.5 ounce (14 grams), this is definitely a lightweight option.

Snow Peak’s Collapsible Coffee Drip

snow peak ultralight pour over coffee filter

Although this probably wouldn’t fall into the “ultralight” gear category, this thing is still pretty nifty. It comes in at 4.9 ounces (140 grams) but it’s foldability gives it a good place in our camping coffee pour-over list. 

Primula Brew Buddy Portable Pour Over

Primula Brew Buddy pour over coffee

This is another lightweight (and cheap) option for a pour over camping coffee maker. The Primula brew buddy comes in at 0.96 ounces (27 grams).

Bigger (Better?) Pour-Over Coffee Makers Perfect For Car Camping

GSI Outdoors JavaDrip Coffee Maker

GSI outdoors Jave coffee Maker

Okay, this thing is pretty cool. It’s an all-in-one pour-over coffee maker perfect for your next camping trip. The pour-over filter sits snuggly in the cup and it all stores away easily. The cup itself has a handle and lid for your convenience. 

OXO Brew Single Serve Dripper Pour Over Coffee Maker

OXO Brew Single Serve Pour Over Coffee Maker

OXO is a popular brand when it comes to kitchen supplies. Even though this coffee maker isn’t specifically designed for camping, it would still work great for any car camping, RV, or camper van outings. 

Wacaco Pipamoka Portable Coffee Maker

Wacaco Pipamoka portable coffe maker

This is an all-in-one pour over coffee maker that comes with a separate container for holding beans. Just put the coffee in the filter, pour in hot water directly into the filter that drains into the insulated thermos, and enjoy!

3) Cowboy Coffee

cowboy coffee

Cowboy coffee is just a cool sounding way to say “throw a bunch of beans into boiling water and drink.”

Really though, that’s pretty much what it is. However, for how simple it is there are a few different ways of doing it. The traditional way is to throw the coarsely ground beans into boiling water. You can either then strain the water before drinking with a coffee filter or cheesecloth (or a bandana if you’re a real cowboy).

Conversely, you can put the ground beans into the bandana or cheesecloth, wrap it up and put that into the boiling water (less of a mess). Cowboy coffee might be the easiest way to make coffee without a coffee maker.

4) Coffee Bags

coffee bags camp coffee

Coffee bags are a thing. Much like their counterpart, the tea bag, coffee bags are simple to use. You simply steep the bag in hot water for a few minutes and then discard the bag. Please make sure to dispose of your trash in an appropriate place. If you are hiking or backpacking, carry out all trash, including used coffee bags. 

Steeped Coffee Co.

how to make coffee without a coffee maker? Steeped coffee co. coffee bags

Steeped Coffee Company makes single-use small-batch coffee “tea” bags. These are perfect for camping or hiking and come in light, medium, and dark roast (as well as decaf).

Different Types of Camping Friendly Coffee Makers

5) Aeropress

aeropress camp coffee maker

The Aeropress is HUGE in the backpacking, hiking, and camping worlds… and for obvious reasons. This thing is awesome.

It works similarly to a French press and creates a perfect cup of joe. Because of how portable it is, it is a common sight among hikers. It comes with it’s own filter holder and compresses the ground beans to a very dense puck which makes clean-up easy. As we’ve stressed many times during this article, you should carry out all of your coffee grounds if you are hiking. Leave no trace!

It is a bit different than a French press, however, because you can use coffee filters which means you can grind your coffee into a finer consistency which allows a full rich flavor without the bitterness often associated with the French Press.

Aeropress Coffee Maker

aeropress coffee maker

Aeropress coffee maker with single-use filters. The coffee only requires about 10 seconds of stirring before you are ready to press and drink!

6) French Press

French press coffee is an acquired taste. Some people love it, other people hate it. 

French press coffee tends to have a strong taste that some people refer to as “bitter.” This is typically because of the coarse ground coffee required to use the French press. Basically, you add the coarse grounds to the device and pour in hot water. You let the water sit for a few minutes, stirring it up from time to time to mix up the grounds. 

After a couple minutes you can compress the plunger and push all the grounds to the bottom. Most French presses have a pour spout and you simply pour and enjoy. 

If you like the flavor of French press coffee than it is a perfect option for camping or even as a permanent coffee staple in a van, RV, or home.

Some French presses are glass. If you are wary of carrying glass camping or in your van/RV, and you should be (we have smashed our way through three of the glass ones so far– twice through stupid human error and the other time remains a van mystery, we woke to a pile of glass waiting in the sink–a sad morning indeed), a camping coffee pot made of stainless-steel works here too.

Steel is easier to clean and keep clean than glass which gets grey and smudgy quickly. The only downside we know of to a steel coffee plunger is you can’t see through it so either get yourself a coffee measuring scoop or play coffee roulette and be prepared to strap yourself in for the caffeine ride of your life.

Stanley All-in-one Adventure French Press

stanley advanture french press

Stanley makes a couple different types of portable camping French Presses. This one weighs just under a pound and is an all-in-one coffee making system. It is sturdy and easy to clean (dishwasher safe). Serves 2-3 people.

Coffee Gator French Press

coffee gator french press

This French press is perfect for home, camping, or traveling in a RV or van. It comes with a separate travel canister for the beans. Serves 3-4 people.

JavaPresse Manual Coffee Grinder

Widesea camping coffee french press

WideSea makes a french press that is perfect for backpacking. It’s 12.8 ounces which is a small price to pay if you love your coffee as much as we do.  Serves 1-2 people.

7) Other French Press Attachments

Some stand-alone backpacking stoves (like the JetBoil) have a French press attachment which work well if you already carry one of these stoves (or are planning on getting one). The JetBoil system and it’s competitor, MSR, are staples of the hiking world and can boil water very fast. 

JetBoil Flash Java Kit System

jet boil coffee maker

This is the JetBoil Flash PLUS the french press attachment.

JetBoil French Press

jet boil french press coffee attachment

The stand-alone attachment for the JetBoil systems.

MSR Reactor 1.7L System

MSR reactor

The JetBoil is powerful, but this thing is insane. Great for large groups.

MSR Reactor French Press

MSR Reactor French Press

The stand-alone attachment for the MSR Reactor systems.

8) Moka Pot or "Stove Top Espresso"

A moka pot is a stove-top coffee maker that passes pressurized boiling water through coffee grounds to brew coffee. It was originally invented by an Italian guy buy the name of Alfonso Bialetti back in the 1930’s. 

Mobile coffee prep gets an upgrade with a stove top espresso maker. Add water to the bottom, coffee grinds to the top and heat over gas flame. This device is cool, funky looking and makes a mean cup of coffee.

Moka pots are perfect camp-friendly coffee makers because they don’t require electricity and can be used on any camp-stove. 

You will want a medium to medium-fine grind for a moka pot. More coarse than espresso but finer than drip coffee. Moka pot coffee is also about 2-3 times stronger than drip coffee and about half the strength of espresso, so keep that in mind!

Primula Aluminum Espresso Moka Pot

moka pot for camping coffee

There isn’t anything too fancy about a moka pot. You basically unscrew the top, place coffee into the filter tube, add water and boil for 2-3 minutes. Serve!

9) Percolator

Percolators are another great stove-top camping solution for coffee. You add the coffee grounds to the top chamber and the water to the bottom chamber and place on the stove. Once the water begins to heat up it travels up the center “tube” and then drips over the coffee grounds.

The brewed coffee goes right back into the lower chamber, where the cycle repeats. Therefor the coffee gets stronger as time goes on. Five-or-so minutes seems to be a perfect amount of time but it will continue brewing indefinitely.

This is an easy choice for camp coffee but it can also be easy to forget, causing it to be over brewed and turn bitter. 

GSI Outdoors 12 Cup Percolator

GSI coffee percolator

Here is GSI again, making another great camping coffee maker. This percolator holds up to 12 cups, making it perfect for multiple people.

Portable Coffee Makers and Espresso Makers

10) Portable Espresso Maker

For truly fresh camping coffee on the go, check out these cool portable espresso machines. These machines are compact, portable and perfect for car camping or hiking. 

Conquenco Coffee Maker (Espresso)

12v espresso maker

If you’re an espresso nut than this is for you. Portable, easy to use, and rechargable via USB or car cigarette-lighter adaptor. This one takes about 8-15 minutes and is recharchable via USB.

Wacaco Nanopresso Espresso Maker

nanospresso coffee maker

This little guy is portable and doesn’t even require electricity or batteries. It is completely manual. You can buy an adaptor so it excepts pods but it is not necessary and will work with any espresso ground coffee beans.

11) Dometic PerfectCoffee MC 01 (12v or 24v)

For a super light and portable single cup coffee machine which plugs into your cigarette lighter, check out the Dometic PerfectCoffee travel device. At 0.6kg in weight and only 11 x 13 cm this unit wont take up much space but will brew you up a perfect cup in 10 minutes.

Simply pour the coffee into the permanent filter, fill the water reservoir and wait. Plenty of time to assemble some breakfast. They make this coffee maker in both 12v and 24v versions.

The downside? You have to find an authorized dealer. Check out their website to learn more.

There are many different kinds of portable coffee makers out on the market, and we won’t go into them all. However, if you want to find out more information check out this great YouTube video by OutdoorZone:

Other Coffee Supplies

Manual Coffee Grinders

When it comes to coffee, whole beans are best for a smoother, fresher taste. Manually grinding your beans with one of these cool retro gadgets is not hard work, it is definitely instagram-worthy and adds a little elbow grease to the whole morning ritual. Choose one that stores any extra grinds in the base, ready for the next cup.

JavaPresse Manual Coffee Grinder

javapresse manual coffee grinder

This guy pairs well with your camping coffee kit. It has adjustable settings, is easy to clean and take apart, and is very durable.

SoulHand - All in One Coffee Grinder / Coffee Maker

soulhand portable coffee grinder camping coffee tool

If you want an all-in-one system, look no further than this guy. It has a grinder, reusable coffee drip filter, portable thermos, bean storage compartment and it’s own storage case. Besides coffee and water, this is everything you need to make a cup of camp coffee.

Portable Electric Coffee Grinders

Are you car camping or living in a van or RV and can’t be bothered grinding the beans yourself? Let a USB powered coffee grinder do all the work at the touch of a button. This camper coffee grinder takes your bean to a fine dust in seconds and is not too hard on your battery in short sharp blasts.

MixPresso Electric USB Powered Grinder

usb powered coffee grinder for camp coffee

This coffee grinder comes with a USB cord so it can be plugged into your vehicle or 12v RV system pretty easily. Since you are only running it in very short bursts, it shouldn’t be a drain on your battery system.

Electric (USB) Milk Frother

Milk frothing whisks come USB powered too, to recreate that mocha-choca-latte or whip up a foamy hot cocoa on a cold evening camping in the woods. Save your wrists the pain and get restaurant results right in your rig. Impressive!

Is fresh milk a problem with no fridge in your campervan? Are you planning long trips off grid or car camping in the wilderness? Bring long life milk instead. UHT milk, soya milk or oat milk will all outlive a carton of cows milk, as will coffee creamer. Or check out your options for super easy super portable refrigeration.

Zulay Super High Powered USB Recharchable Milk Frother

Milk frother usb powered

This milk frother is fully recharchable by USB and pretty easy to use. It is high powered, guaranteeing that you will get full-maximum froth!

Coffee Considerations for Your Van or RV

instant coffee mess

If possible, keep your coffee pot upright in the sink or wherever it has no room to move around in transit or you’ll end up with a mess like the above picture. Consider a cupboard that closes tight, maybe your most reliable storage space. We always store essential items that can break in the cupboard closest to the floor, giving them less distance to fall. The same advice applies to your water filter jug. Consider the shape of your sink and which model will fit!

When it comes time to empty your grinds, scoop them into your trash bag (dry coffee grinds can help neutralize and disguise any nasty smells already lurking in there).

Never put coffee grinds down the drain of your sink. They stick together like sawdust, cause blockages in the little pipes fast and will hang around in the dark corners your grey water waste tank forever.

Whether you use beans, ground or pods, always carry enough coffee, and extra to serve the weary travelers you may meet along your way. Nothing says ‘welcome to my rig’ than a steaming hot cup of Joe.

Best Cassette Toilet | Portable Toilet Reviews

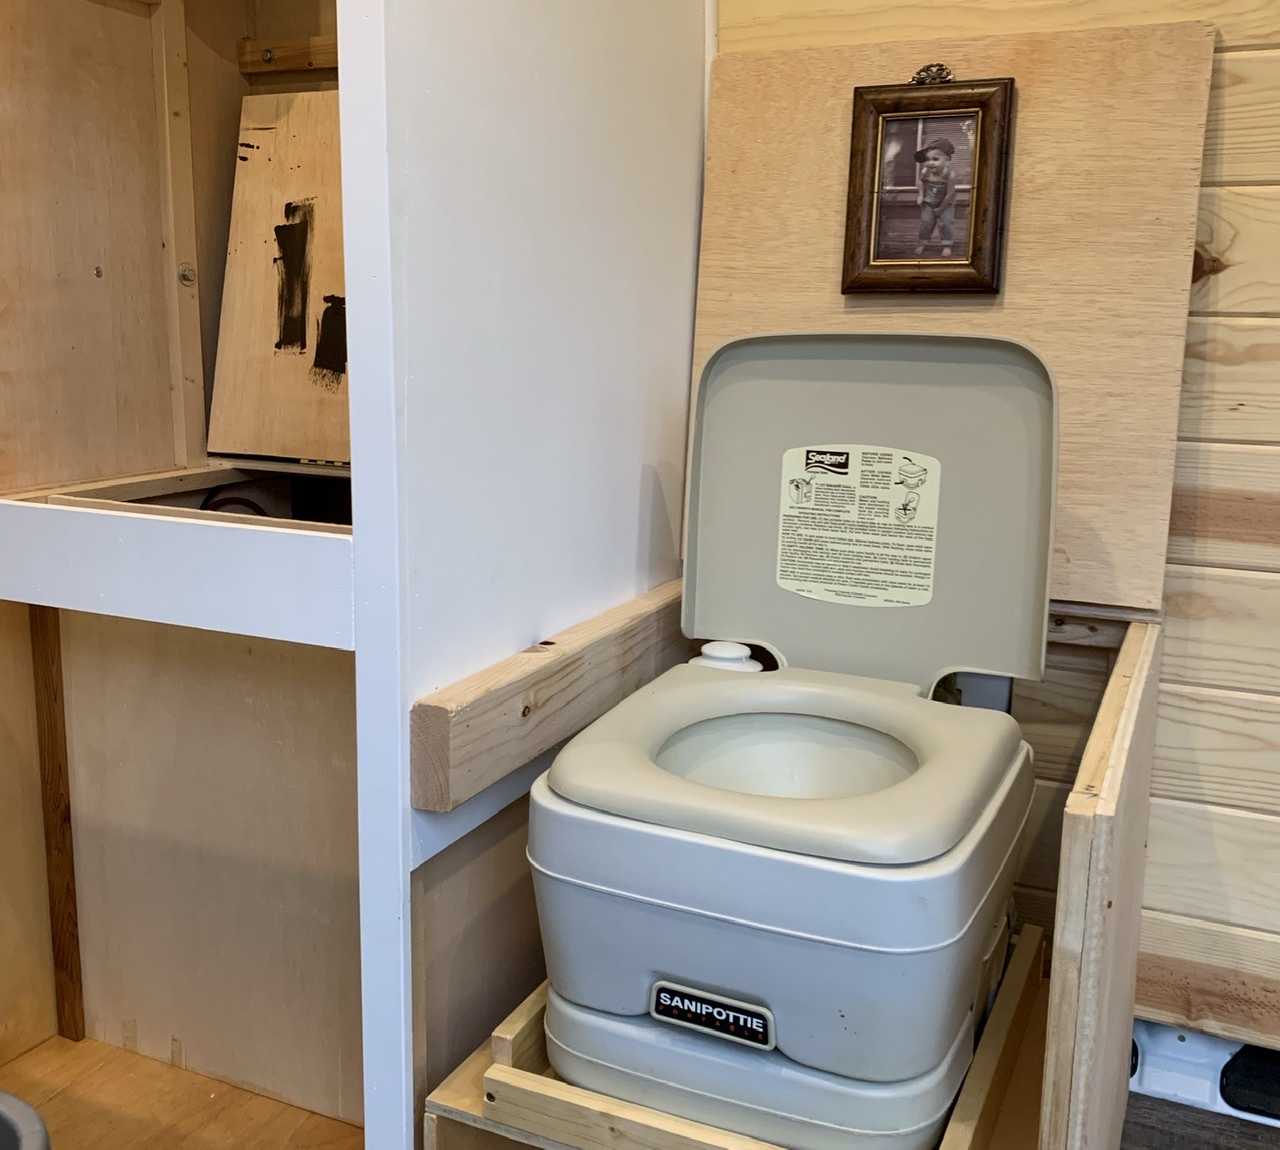
vanlife portable toilet

So, you’ve decided to add a toilet to your campervan and now face the dilemma of figuring out which one to purchase. Maybe you feel a wee bit overwhelmed with the seemingly endless options and overrun with other people’s opinions. Fear not. There are a few steps you can take to help you make a solid decision about where to deposit your solids, pun intended. In this article we will discuss the best cassette toilet options.

Cassette toilets are sometimes referred to as chemical toilets, so we will use that term throughout the article as well.

If you haven’t read it already, head over to our article about the best portable toilet options for your campervan or RV. There we will discuss why you would need a toilet, as well as (nearly) every option available (composting, bucket toilets, shitting in the woods, the she-wee, and a few others). Here, however, we will focus on the best cassette toilets. 

The Best Cassette Toilet Options (at a glance)

A quick little overview of what we think the best cassette toiles are in each category. If you want to know why, you’ll have to read on. 

Best Cassette Toilet Overall

Thetford Porta Potti 365
thetford best cassette toilet

Best Cassette Toilet on a Budget

CamCo Portable Cassette Toilet
best cassette toilet for a budget CamCo

Best Cassette Toilet w/ Small Footprint

Thetford Porta Potti 135
best cassette toilet with small footprint

Best Luxury Cassette Toilet

Thetford Porta Potti White
best cassette toilet luxury

Toilet Talk

What is a Cassette Toilet?

Cassette toilets are fully contained portable toilets that are perfect for RV, marine, camping, and vanlife. Generally, they all work in the same similar fashion.
They usually consist of a waste tank and a fresh tank, of varying sizes. You do your business in the bowl, then flush the water down into the waste tank. Most cassette toilets have a pull-door that opens the waste tank and use either a manual push pump or a electric push-button to flush.

Other functions might be advertised along with the toilets, such as a TP roll holder, waste tank leveler, adjustable seat height, or locking lids.

When considering adding a camping toilet to your rig, the first thing you need to do is measure the space you have available. Size factor could be a dealmaker or a dealbreaker. Some models of portapotties are bigger and bulkier and simply might not fit.

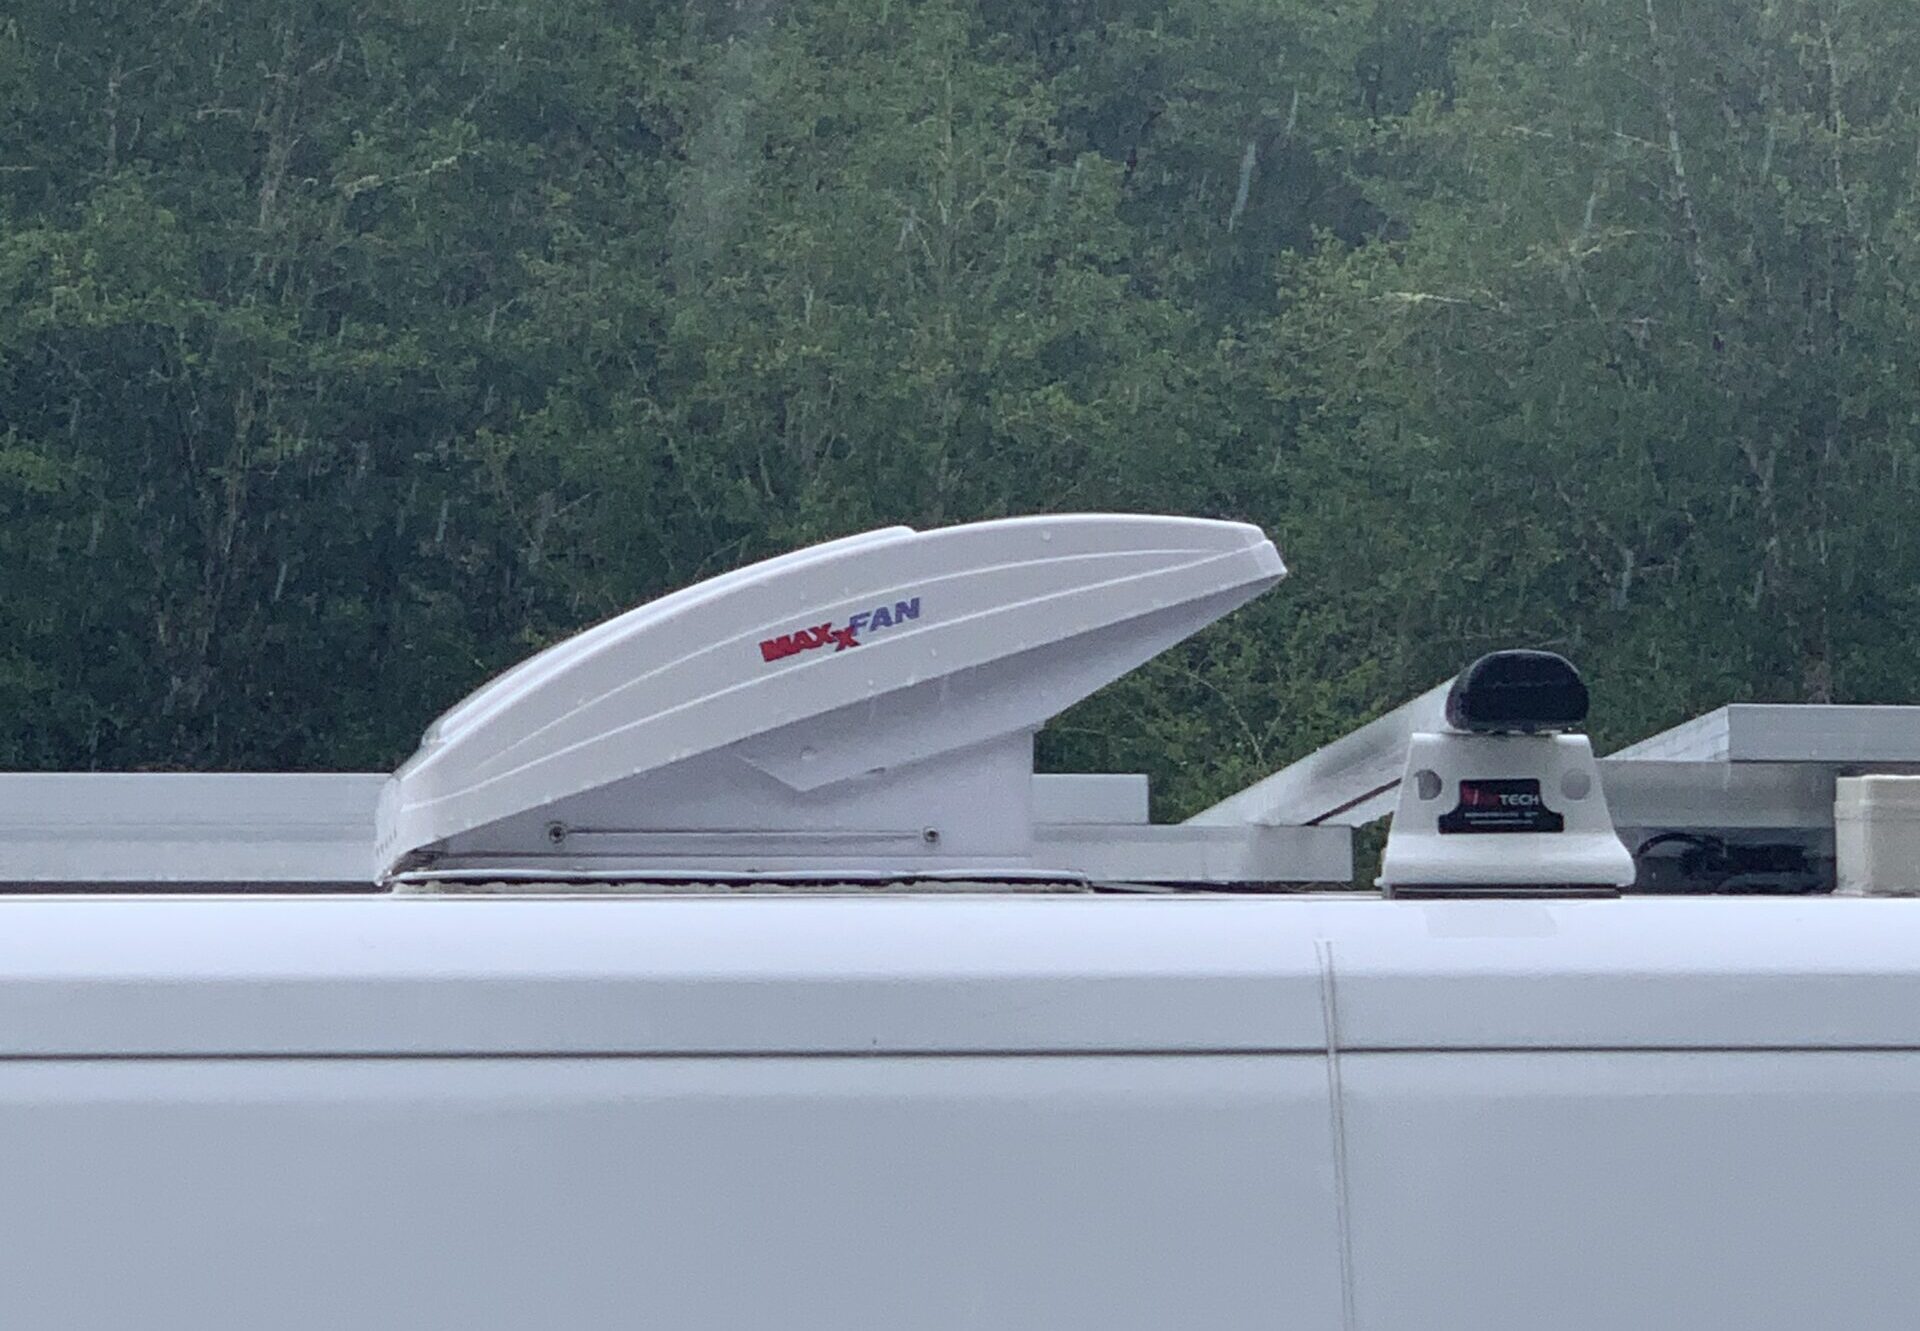
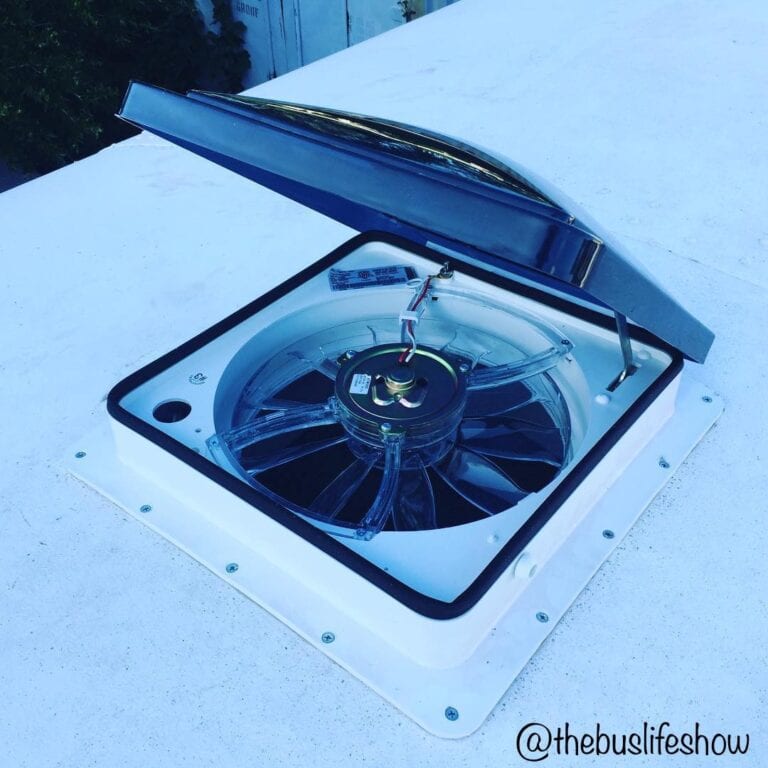
If you are still in the building stage, plan to install a roof vent, like the Maxxair Maxxfan or the Dometic Fantastic Fan. Try to keep your toilet space easily accessible, well ventilated and consider the weight of these shitboxes when they are full. Don’t impede the eventual emptying by having to lift the top section too far up or too far over to separate the top from the bottom.

Some vans have toilets hidden inside box seating which is great until emptying time so if you are building one of these, ensure the toilet slides right out easily, even when full.

Do You Even Need a Portable Cassette Toilet?

There are many options to suit your van and your budget. On one hand, you can easily just shit in the woods. On the other, a fancy John, with a gleaming white ceramic bowl, electrical flush and tank level indicator can be plumbed straight into your RV waterpipes for maximum convenience and minimum contact with effluence.

The pros of the latter option are obvious but what about the cons?

A permanent toilet is fixed in place, requiring a much larger dedicated bathroom space. They have more parts that could break which may be difficult to access or may require a professional to fix.

The problem of where to empty such a toilet remains an issue as well. A cassette toilet (or camping toilet) is a smaller, lighter and more mobile portapotty. What these toilets lack in tank capacity they make up for in ease of use, affordability, mobility and options for emptying.

So if you’re trying to figure out your bathroom situation as you plan your van build, consider a cassette toilet. It is a happy medium between digging a cathole behind a bush and spending a thousand dollars to plumb in a permenant toilet.

So then, what are best cassette toilets for your campervan or RV?

The Dometic Portable Toilet

Dometic is a very common and well-respected name in the RV, campervan, and offroading communities. If you see Dometic’s name you can be pretty certain you are getting a quality product, whatever that product is, and it is no different with their portable toilets.

Dometic’s toilets come with 2.5 or 5-gallon waste tank options and secure side latches to lock the sections together tightly. These thrones are portable, strong, and only way around 3lb when empty. This makes it a perfect cassette toilet option for camping and RV living. 

These toilets do the job of letting you do your job comfortably!

The no frills model is your basic cassette toilet. It has a manual pull lever for emptying the contents of the toilet into the waste tank as well as a push-pump-flush.

The “some frills” model has a few upgrades. Dometic chose to add an electric flush (battery operated) button and has optional upgrade for mountain brackets to secure it into your van conversion build.

Dometic's Best Cassette Toilet Options

No Frills

Dometic Portable Cassette Toilet (301096206)

Dometic 2.5 gallon cassette toilet
  • 2.5 Gallon (9.5L) Fresh Water Capacity
  • 2.5 Gallon (9.5L) or 5 Gallon (19L) Waste Water Tank
  • 16.5 x 14.5 x 12.5 inches
  • Squat and simple, no frills

Some Frills

Dometic Cassette Toilet (301097606)

  • 2.6 Gallon (9.5L) Fresh Water Capacity
  • 2.6 Gallon (9.5L) or 5 Gallon (19L) Waste Water Tank
  • 13.5 x 15.5 x 16.5 inches
  • Powerful electric push button flush
  • Optional mounting brackets for secure mount

Camco Cassette Toilets

Camco is another well trusted brand when it comes to anything camping related. Of course, they also make portable camping toilets or else they wouldn’t have made this list.

Their (41541) model cassette toilet boasts of its sturdiness, catering to weights of to up to 330lbs. With much the same features as the toilets above, they also offer drop-in toilet tablets and biodegradable sachets for the waste tank.

Camco's Best Cassette Toilet Options

Large Holding Tank

Camco Portable Travel Toilet (41541)

best cassette toilet for a budget CamCo
  • 2.6 Gallon (9.5L) Fresh Water Capacity
  • 2.6 Gallon (9.5L) or 5.3 Gallon (20L) Waste Water Tank
  • 15.5 inch H x 14 inch W x 16 inch
  • Cheap, heavy-duty with higher weight limit

Small Footprint

Camco Premium Portable Travel Toilet (41545)

camco portable toilet
 
  • 5.3 Gallon (20L) Waste Water Tank
  • 12″ H x 16″ W x 17″ D
  • 11.3 lbs when empty
  • Small footprint
ON SALE!!

At the time of this article, both of these toilets are on sale for 50% off on Amazon. Make sure to check and see if they still are!

SereneLife Chemical Toilets

Want to make your tiny-house-on-wheels even more serene? 

Light a candle, sit back and conduct your business on a SereneLife Portable Toilet System. Complete with a handy carry bag and integrated level indicator, these cassette toilets have a rotating pipe for ease of emptying and the unit looks and feels like a real house toilet. 

The large water reserve tank promises 50+ flushes, is that enough for your relaxing weekend off grid in the boonies? I would certainly hope so!

SereneLife's Best Cassette Toilet

Serene Life Outdoor Portable Toilet
serene Life outdoor portable toilet
  • 3.2 Gallon (12L) Fresh Water Capacity
  • 5.3 Gallon (20L) Waste Water Tank
  • 20.90 x 20.50 x 18.60 Inches
  • Comes with its own carrying case

Thetford Portable Cassette Toilet

Thetford is arguably the best-known brand name of portapotty. They invented the cassette toilet we know and love! Ok, perhaps love is a strong word to use in relation to any toilet, it is just a box of poo after all. It does need to be emptied and that is pretty gross, even at the best of times.

Some jobs just must be done, however, and the Thetford cassette toilet makes it easy.

There are many types of Thetford units on the market, and they all come with their own pro’s and con’s. Thetford also has what we consider to be some of the overall best cassette toilet options.

Thetford Cassette Toilets

Thetford Porta Potti 135
best cassette toilet with small footprint

This cassette toilet has the smallest capacity out of the Thetford models. However, it can fit into smaller storage areas because of how squat it is. The toilet has a manual pull valve for the waste tank and a pumper to flush. Plus, it is pretty damn cheap.

  • 2.6 Gallon (9.5L) Fresh Water Capacity
  • 2.6 Gallon (9.5L) Waste Water Tank
  • 12.2″ Height x 13.5″ Width x 15″ Depth
  • Squat and simple
Thetford Porta Potti 345
thetford porta pottie 345 great portable toilet

This cassette toilet is very similar to the porta potti 135 model listed above with one difference. A bigger tank! Bigger is better, right? Also, I realize in this picture it looks like the tank is smaller than the 135… it’s not.

  • 4 Gallon (15L) Fresh Water Capacity
  • 3.2 Gallon (12L) Waste Water Tank
  • 13″ height x 15″ width x 16.8″ depth
  • Squat and simple… but slightly bigger (that’s what she said)
FINALLY, OUR FAVORITE (2) PORTABLE CASSETTE TOILETS

Actually, we like both of these toilets. One is more basic, the other more luxurious.

Thetford Porta Potti 365
thetford big boy is the biggest and best portable toilet

Sometimes more frills is not necessarily better, however. This Thetford porta potty has the old standard manual push-pump for flushing as opposed to a battery powered button. Less electronics typically means less that could go wrong. 

  • 4 Gallon (15L) Fresh Water Capacity
  • 5.5 Gallon (21L) Waste Water Tank
  • 15.36 x 17.13 x 16.6 inches
  • Easy to dump with it’s swivel dump spout
Thetford Porta Potti White
thetford luxury potty is a great portable toilet option

Now, not all portable cassette toilets are created equal and this is no exception. This Thetford model not only has a unique, slim design that allows it to fit in a variety of spaces, it has an electric flush. That’s right, pop some batteries in this sucker and it will suck your poo right down into the waste water tank. It’s the only model on our list that does this. Want to know something else that’s cool? it has an adjustable seat height… yeah. Crazy, right?

  • 4 Gallon (15L) Fresh Water Capacity
  • 5.5 Gallon (21L) Waste Water Tank
  • 17.6″ height x 15.2″ width x 17.7″ depth
  • Adjustable seat height

Dump Your Dumps

Where to Dump Your Dumps

Dumping your cassette toilet is a fairly easy process, even if it is perhaps a little stinky. There are some general rules to consider, however.

Never, ever, ever dump your waste tank into anywhere other than designated areas. This means ABSOLUTELY NO dumping into forests, rivers, streams, holes in the ground, pit toilets, outhouses, sidewalks, street drains, garbage cans… actually it might be a bit easier for me to tell you where you CAN dump it.

Cassette toilets can be dumped in the following places,

  • Porta-Pottis (Like the HoneyBucket kind)
  • Flushable toilets (like at rest stops or your very understanding friend’s house)
  • Septic tanks (make sure you are using a septic tank safe RV waste tank solution)
  • RV dump stations

The Dumping Process

The dumping process is pretty straight-forward. Most waste tanks are attached to the cassette toilet by a pair of latches. Find wherever these latches are located and, well, unlatch them.

Make sure the trap-door lid is tightly shut before attempting to move around the waste tank. Your cassette toilet should have a handle on it somewhere. Use that to carry it to the appropriate dump site.

There should be some sort of swivel-out drainage tube somewhere on that waste tank. Swivel it out, uncap it if it has a lid. If you’re really good you will be able to plug your nose with one hand and dump the sewage with the other.

If you use appropriate chemicals your cassette toilet’s waste tank shouldn’t be terrible but you might want to give it a few good rinses to clean out any leftovers and use a cleaning product from time to time.

Dumping tips

  • Fill the waste tank with water to make dumping easier
  • Pee in your cassette toilet as an alternative to adding water
  • Wear gloves
  • Avoid the splash!

Toilet Cleaning and Maintenance

All cassette and chemical toilets need to be taken care of and cleaned regularly. Refer to the user manual for instructions and add chemicals only where advised. Pink-and-blue toilet chemicals will keep your waste breaking down and your white bowl sparkling.

Cassette Toilet Cleaner

This Elsan brand toilet fluid is eco-friendly, doesn’t generate that chemically sterile smell and comes in larger 2 liter bottles. No excuses for that smell now!

elsan organic toilet cleaning solution

Whatever you do don’t use pure bleach to clean your cassette toilets. In fact, we don’t even recommend using diluted bleach. Bleach can break down your seals causing the possibility of a nasty leak.

If you dump into a septic tank that is even more reason to be weary of bleach. Large amounts of bleach can kill the beneficial bacteria in these systems.

The Best Cassette Toilet Chemicals

Keep your cassette toilet clean with these toilet chemicals, we especially like the environmentally friendly additive which promises to keep your unit odor free without damaging the seals.

Thetford's 3-in-1 Eco Smart

Eco-Friendly

eco smart cassette toilet chemicals

TST Max Cassette Toilet Chemicals

TST max cassette toilet chemical

Thetford Aqua-Kem Toilet Deodorizer

Thetford Aqua-kem

It is important to keep your waste tank clean and smell-free. Definitely use a recommended RV waste tank chemical for your cassette toilet. These products will assist in the breaking down of the poops and the toilet paper, making it easier to dump your dumps. 


Winterizing Your Cassette Toilet

If you’re going to be in a cold climate for the winter, cassette toilets run the risk of freezing. This freezing will not only cause the toilet to be unusable at that particular moment, but it can break seals ruining the toilet all-together. 

Look into adding small amounts of environmentally safe anti-freeze to avoid costly repairs.

Toilet Accessories

Privacy Tents for your Camper Toilet

No room for a portapotty in your setup? Maybe you are tent camping for a few days and need the assurance of a toilet available? 

Check out these nifty privacy rooms. Affordable, lightweight and assembled in minutes, a bathroom tent is great for longer trips, larger families and having easy access to a private area can completely transform the camping experience for some.

GreenElephant Pop-up Utility Tent

green elephant pop up portable toilet tent

GigaTent Portable Pop-up Pod

Giga tent portable toilet tent

Extra Cassettes

Staying off grid for a long time and need room for more waste? The beauty of a cassette toilet means you can always carry an extra cassette and double your waste capacity. Make use of very sporadic trips empty the toilet and never get caught short again! 

Consider keeping a large lidded plastic box or a sturdy bag to carry the full one. Accidents can and do happen so keep things well contained for worry free waste management.

Portable Camping Sink

Got the room for a sink but don’t want to drill excess holes in the floor of your rig? Or prefer to have a more simple set up?

Consider one of these portable camping sinks! Fasten it to the floor and fill the reserve with up to 19 liters of fresh water. Use the foot pump for hands free handwashing and the built in towel hanger for extra convenience. It even includes space for a bottle of handsoap or sanitizer. This could be the perfect portable solution for easily accessible drinking water too if space is tight!

SereneLife Portable Camping Sink

portable sink by serenelife

Multi-use Toilet Accessory Buddy

And lastly, I know you’d like to think your shit don’t stink but let’s be honest with each other. We are all vanlifers (or aspiring vanlifers) and we all know the score. Keep a handy set of toilet cleaning implements nearby to tidy up your streaky mess and keep your portapotty bowl sparkling.

This cool portable unit houses a toilet brush, a travel trash bin and extra storage for your roll. Fully waterproof for large scale liquid accidents and with two colors to choose from, this is a functional and hygienic choice to make your small room the best equipped room in your rig!

cassette toilet essentials

RV/Marine Toilet Paper

Using proper toilet paper in your portable cassette toilet will safe you hassle down the road. RV TP is specifically designed to break down quickly with the chemical additives which allows for easier dumping and breakdown after dumping.

We recommend 1-ply if you can stand it, for the above-mentioned reasons, but there is also 2-ply offered as well.

Cassette Toilet Pro's and Con's

Pro's

  • Freedom. Cassette toilets offer you a bit more freedom than relying on public toilet options or even a more permanent RV or composting toilet. Think about it, you can remove the cassette toilet and take it somewhere more private if you have a van full of people!
  • Smell. Since they are contained systems, cassette toilets offer better smell-protection than the old bucket-and-chuckit method
  • No separation of pee and poo. Unlike the bucket method or a composting toilet, you don’t need to sperate your liquids from your solids.
  • Ease of use. These cassette toilets are fairly simple without a ton of frills. This means less things that could go wrong, which is a good thing. In contrast, a composting toilet has an electric fan, multiple chambers, a churner, and a vent port. Jeeze.
  • Cost. These toilets can be found for under $100, which is a pretty good deal to me.

Con's

  • The Smell. I know I listed smell as a positive but cassette toilets can still start to stink if they arn’t taken care of properly. Make sure to clean and dump your toilet frequently. 
  • Spillage. Yuck. It will most likely happen to you at SOME point during your adventures. When you are having to empty your cassette toilet manually, you are bound to have some accidents.
  • Space. I don’t know if I’d count this as a con, strictly speaking. It’s more of something you just have to be aware about. These toilets do take up space in an already tiny environment.

7 Cassette Toilet Tips

1) Dump Frequently

Dump frequently, whenever you get the chance, even if you don’t really need to. This will help reduce smell and keep your toilet empty for when you need it most.

Also, you never really know when you are going to find a proper place to dump your cassette toilet, so keeping it as empty as possible is best practice.

2) Keep lid closed when opening valve

Whenever you open the waste tank valve-door, keep the lid of the toilet closed. These tanks sometimes build up pressure, especially at altitudes, and can spray right up into your face if you are not careful.

3) Check the waste valve before using the toilet

For the same reasoning as above, it is best to check and see if that waste water tank on your cassette toilet is pressurized before actually using the toilet. Start by opening the valve just ever-so-slightly with the lid closed. 

Be especially cautious if you have gone up in elevation.

4) Keep the cassette toilet clean

Keeping the cassette toilet clean will help prevent bad odors from building up in your tank. These toilets are sealed units, but they can still build up a foul smell if not taken care of and cleaned properly.

Again, avoid bleach and use designated RV cassette toilet cleaning solutions.

5) Ventilate

Crack the windows before you poop! Especially if you live in your van with a partner. It’s just good etiquette. In fact, if you have a RV roof vent fan, put that sucker on exhaust mode to help suck out the smell.

6) Use less toilet paper

Use less toilet paper, and the proper toilet paper. The less toilet paper in the waste tank the easier your cassette toilet will be to dump. Big wads of poorly dissolvable TP can clog the dump spout and make your life miserable!

7) Whenever possible, use something else

One of the easiest and most simple ways to keep your cassette toilet clean and your van smell free is to use something else to go to the bathroom. Whether this is a public bathroom, your friend’s place, or digging a cathole when you’re out boondocking; all these things are more pleasant than dumping a cassette toilet’s waste tank.

In Conclusion

STILL not convinced you need a cassette toilet in your RV or campervan? STILL unsure of the benefits of an easily accessible, easily emptied portapotty in your rig? Check out some other toileting options here: 

Best Chinese Diesel Heaters (and Other Van Heating Options)

best chinese diesel heaters featured image

Well, it’s getting to be that time of year again… you know, the cold time. But just because it is cold, doesn’t mean you have to suffer. There are many ways to heat up your campervan or RV and one of the most popular options are these chinese diesel heaters everyone keeps talking about. 

What is the deal with these diesel heaters and are they a good fit for your camper van? 

It’s no suprise that having a heat source of some kind is essential for van life if you plan on being anywhere that has even a semblence of a winter. There are typically propane, diesel, and electric heat source options.

We recently updated this article for the 2021-2022 winter and we’ll focus on diesel heaters, but touch on other heater options as well. In this most recent update, we’ve added the following to this article:

  • Updated the 6 best chinese diesel heaters to make sure they truly reflect what we believe to be the best available.
  • Included the two most popular chinese diesel heaters according to what people like you are purchasing.
  • Added our thoughts on the Propex HeatSource2000 after two cold winters using it.

We hope you find this article beneficial.

Let’s start with simply explaining what Chinese diesel heaters are and why they started to become so dang popular. Winter is coming, after all…

A Brief History of Diesel Heaters

Diesel heaters have been around for quite a while and are a popular choice of a heat source in marine, RV, camper van, and workshop communities. Traditionally, these heaters were only produced by a handful of European companies (mostly German) and sold at only select dealers, at a fairly high premium. 

These diesel heaters were (and still are) a popular choice in van life, but it was common for these heaters to sell for over $1,000. Regardless of their price, they still remained very prevelant… mainly because they were the only diesel heater options. 

Chinese Diesel Heaters, Where Did They Come From?

In recent years, however, Chinese companies began to produce their own, significantly cheaper, versions of these diesel heaters. At first, these heaters were known to have significant issues in regards to breaking, missing and mislabeled parts. They also took a long time to ship and arrive in the Western world.

Although they still might not be perfect, these Chinese diesel heaters have come a long way and gained a massive amount of support in the camper van communities. They often prove to be comparable on nearly every level as their European counterparts, and for a fraction of the cost. These suckers go for about $125-$175, have far faster shipping times through Amazon, and, even though the customer support might be lacking, they have a bustling grassroots community of people prepared to assist you with any repairs or maintenance.

Did you know? 

You don’t have to have a diesel vehicle to run a diesel heater? They often come with their own mini gas-tank. 

Now, these Chinese diesel heaters might not be for everyone. In fact, I didn’t even go with one for my van build (more on what I did go with, and why I wish I hadn’t, at the end). If you think these heaters might be for you, we picked 5 reliable choices for our best Chinese diesel heaters.

The Best Chinese Diesel Heaters

3KW Happybuy Diesel Heater

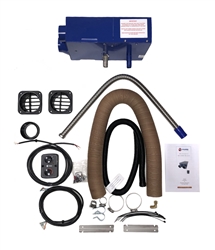
happybuy 3kw chinese diesel heater and parts

Heater power: 3KW

Fuel consumption: 0.1-0.35(1/H)

Motor weight: 4.5kg/9.9LBS

Happybuy is a popular branding for these Chinese diesel heaters. This heater comes in at 3,000 watts instead of the typical 5,000 or 8,000 watts for roughly the same price. The benefit of this is obviously the lower electrical power draw and fuel consumption. 3KW should be perfectly suited to a small place like a camper van.

8KW Wayska Diesel Heater

Wayska Chinese Diesel Heater 8KW

Heater power: 8KW

Fuel consumption: 0.2-0.5

Motor weight: 7.8kg/17.4LBS

If you’re looking for a very powerful diesel heater, this Wayska is a 8,000 watt model. Obviously, this will consume more power but it will also (in theory) heat faster than the other models and are great for bigger RV’s and workshops. This particular diesel heater has very good ratings AND is part of Amazon Prime for quick delivery. This one also has a 15L tank, where the others on our list have 10L.

*** There has been reports that some of the 8KW heaters are simply 5KW models that have been adjusted to pump out a bit more heat. 

5KW 12v Diesel Heater WITH SILENCER

5KW 12v diesel heater

Heater power: 5KW

Fuel consumption: 0.64

Motor weight: 8.1kg/18LBS

It’s no secret that diesel heaters (or many heaters for that matter) can be extremely noisy. There are a lot of aftermarket “silencers” available to help quiet them down, so why not get a model that already comes with one like this 5kw option.

5KW maXpeedingrods 12v Diesel Air Heater

chinese diesel heater most popular on amazon

Heater power: 5KW

Fuel consumption: unknown

Motor weight: 7.53kg/16.6LBS

This one, as far as we can find, is the highest rated diesel heater on Amazon. 4.5 stars with over 1200 ratings. That alone earns it a place on our list, but really… who is coming up with these branding names? maXpeedingrods. What does that even mean?

The Most Popular Chinese Diesel Heaters

The following two heaters are by and far the most popular models according to the analytics of what people are buying through our affiliate links.

5KW Happybuy Diesel Heater

happybuy 5KW chinese diesel heater and parts

Heater power: 5KW

Fuel consumption: 0.11-0.51(1/H)

Motor weight: 4.5kg/9.9LBS

Happybuy is a popular branding of these diesel heaters and comes with very good reviews overall. The set-up should be simple enough (video below on installation) and the shipping is estimated around 1 week. At around $150, this is an affordable option. 5kw might be a bit on the more powerful side when it comes to heating a van, however.

2KW Superfastracing Diesel Heater

superfastracing 2kw chinese diesel heater and parts

Heater power: 2KW

Fuel consumption: N/A

Motor weight: 7kg/15.6lbs

Want something with even LESS power draw and fuel consumption? This 2KW model is for you. A bonus is that it is available through Amazon Prime so that shipping will be much quicker. If you want or need something quick this chinese diesel heater is for you. Bonus points for the name of the brand. Superfastracing… 

Troubleshooting and Common Problems With Chinese Diesel Heaters

Now, there are some issues with these chinese diesel heaters. Will touch on each of these problems below.

  1. Broken or mislabled parts
  2. Noise
  3. Tuning and adjusting for high altitude

Broken or mislabled parts on Chinese diesel heaters

One of the most common complaints is broken or mislabled parts. Also, sometimes the directions that come with the heaters are poorly written and hard to follow. Add to that the fact that if you do have any broken or faulty parts it is not likely that you can just find easy replacements or send it in for a quick repair. You might think “why would I get a Chinese diesel heater in the first place?”

Well, luckily these heaters are still a very good option as a heat source for your van, RV, or work-shop. The particular issues and problems with broken or mislabled parts are becoming less common as these heaters become MORE common. Plus, since you can buy like 8 of these for the price of just one of the expensive European models, it almost becomes a no-brainer.

Now, I won’t claim to be an expert at fixing or repairing these Chinese diesel heaters, but as the folks over at RVdaily.com stated,

“there is a huge online community of owners who have posted lots of supporting material on the internet, including a vast number of YouTube videos detailing the installation process as well as troubleshooting problems”

“The Chinese Diesel Air Heater – Troubleshooting and Parts Sales Facebook group is by far the most popular with over 25,000 (now 45k) members across the world. They have developed an extensive array of documents in their files section that anyone installing one of these heaters will find extremely useful when researching what heaters to buy and how to get them working successfully.”

This online Facebook group that they mentioned is AMAZING. These people are dedicated to fixing, repairing, and troubleshooting the massive variety of Chinese diesel heaters.

Noise With Diesel Heaters

It’s no secret that diesel heaters can be noisy. In fact, propane heaters can be noisy too.

If you end up getting one of the “name-brand” European models of heaters located later in this post, you can often find a specifically made muffler or silencer for them. However, if you go the Chinese diesel heater route that might not be the case.

Luckily, there are aftermarket mufflers found easily enough. Or you can always get one that already comes with a muffler/silencer.

Tuning and Adjusting for High Altitude

If you plan on spending any time up in the mountains or, say, Colorado… you will need to adjust your Chinese diesel heater for high altitude. 

There are a ton of videos and online resources that show you how to do this. Check out the video located in the next section about installing a Chinese diesel heater because it also goes into detail about how to tune them.

There are a lot more of them out there, but we feel like the one’s we listed are the best Chinese diesel heaters available and are pretty confident that if you go with one of the 5 listed above, you shouldn’t have any issues with missing or mislabeled parts. 

Installing Your Chinese Diesel Heater

***Check to make sure your diesel heaters can be tuned for high altitude or are compatible with high altitude kits.

Installation for a chinese diesel heater might be slightly different depending on model, but should all follow a pretty similar plan. 

They all should have a plastic fuel container, an exhaust tube, and intake and output vents. Also, they should come with all the parts that you need to wire them and some have electronic digital displays. Some might need a high-altitude adaptor if you are going to be in, well… high-altitude, so check the specs on that.

This video goes over installation and tuning your chinese diesel heater for high-altitude:

Other Diesel Heaters For Van Life

Now, all that being said, there are other diesel heater options for your van, RV, boar, or workshop. We hinted at them up above, but they are the Webasto and Eberspacher. These are the big names in the diesel heating world. 

Both companies have been around for a while, both are German made, and both are considered reliable options for heating your camper van. 

Just like their Chinese counterparts, they arn’t perfect. At least they are made by established companies where you will find some sembelance of customer support.

As mentioned above, these heaters are expensive to buy and expensive to repair and can usually only be found at certified licensed dealers. 

Other Diesel Heaters For Your Van

Not into the chinese diesel heaters? Check out these models that started the whole craze, the European Diesel Heaters.

Webasto 2KW-4KW

webasto european diesel heater

Heater power: 2-4KW

Fuel consumption: 0.12 – 0.24 liters per hour

Motor weight: 2.74kg/6.04lbs

This is a very popular european 12v diesel heater. It’s a very reputable brand but can be difficult to find in the states. Only certified dealers sell them. If you’re in Europe you shouldn’t have any issue. Otherwise, check with van builders or semi truck suppliers. An extra bonus, they have a 2 year warranty. The downside; it’s expensive.

0.85KW - 2.2KW Eberspacher Esbar Airtronic 12v Diesel Heater

eberspacher esbar european german heater

Heater power: 0.85-2.2KW

Fuel consumption: N/A

Motor weight: 6.7kg/14.72lbs

Wow. This one is the most expensive heater on the list but it comes with the works. It’s self regulating, comes with a remote, has a digital display. Also, it has a remarkably low power draw compared to even some of the Chinese diesel heaters. You can get the optional high-altitude kit with this one.

Best Propane Heater

Okay, so what if you don’t want a diesel heater? Maybe you want to get a propane heater like the Propex HS2000? There’s nothing wrong with that.

Propane heaters are great and propane is cheap. Their main issue is the propane tank itself, and where to store it

We wont go into super detail about propane heaters, because we think they deserve their own post, but these two are our favorites and what we view as the best propane heaters available.

Propex HS 2000 (HeatSource 2000)

propex hs2000 propane heater

The Propex HS2000 is a propane heating unit that is fairly simple to install. Propane burns “wet” but the nice thing about the heatsource 2000 is that it vents everything outside so you won’t have the condensation issues you might otherwise have with other heater options. This is definitely the best vented propane heater for your RV or van.

The one bad thing is that it can be hard to find one. They are often sold out online but can be found at local custom van suppliers.

Mr. Buddy Propane Heater (indoor safe model only)

mr buddy indoor safe propane heater

Mr. Buddy heaters are very popular options. They now have an indoor safe model which, technically, should be safe to use in a van. We wouldn’t recommend any other version and still suggest opening a window if you are going to run one of these.

Also, since these don’t vent anything outside the van, the condensation of the wet burning propane might be a problem.

Pro’s are that it is cheap and easy to use (no installation required).

Now, I’ve had a Propex HeatSource2000 in my van over two very cold winters. I spent one winter in Colorado and one in Missouri. Normally, the heater worked great. On the coldest nights of the year, the Propex struggled a bit. For a couple days there the temperature got to -20 Fahrenheit and the heater struggled to keep the van in the 40’s! Part of that might be insulation, or wind blowing underneath the van, sucking out the heat. Part of it just might be because the Propex Heatsource isn’t the best. Find out more in my upcoming full review of the HeatSource2000.

Final, but important, thoughts...

Whatever you decide to go with, don’t forget a good Carbon Monoxide detector. You can get a nice battery powered one and stick it up in your sleeping area.

If you’re running any sort of propane in your van, it is also important to get a proper propane detector.

Carbon Monoxide Detector

carbon monoxide detector for chinese diesel heaters

Propane Detector

propane detector for propane heating systems

I ended up going with the Propex HS2000 for my van build. I love it, it’s a great heater. It keeps me warm and toasty. All that being said, it cost a small fortune. I could have gotten several of the diesel heaters listed in this article for the price of my propex, and not have to deal with having propane in my van!

However, hindsight is 20/20 and the show must go on!

A good heater is only as good as your insulation. Make sure you check out our article about van insulation,

van insulation
William Grubb

A Comprehensive Guide To Van Insulation

What is the best way to go about your van insulation?  Well… that is going to be an ever-ongoing debate within the vanlife community and

5 Best Van Awnings For Your Campervan (2022)

Van awning for van life

So you’re thinking about getting a van awning?

We all understand that van life means occupying a small space that allows you to see the world in a new and exciting manner. 

For many, this means doubling down and trading possessions for experiences and new adventures. There’s excitement to the notion of traveling the world living out of a campervan and seeing new places.There’s also the reality that your home is now limited to the space inside your vehicle. 

But it doesn’t have to be. 

By having a van awning you can expand your living space while camping, at the beach, at a park, or anywhere it allows… even a Walmart parking lot! (Just kidding, don’t do that)

Heading off the grid for a long period? Are you a weekend warrior who likes to camp and hike in the desert?  Do you go to the beach often? 

Wherever your van takes you it’s nice to enjoy additional space, shade, and shelter. 

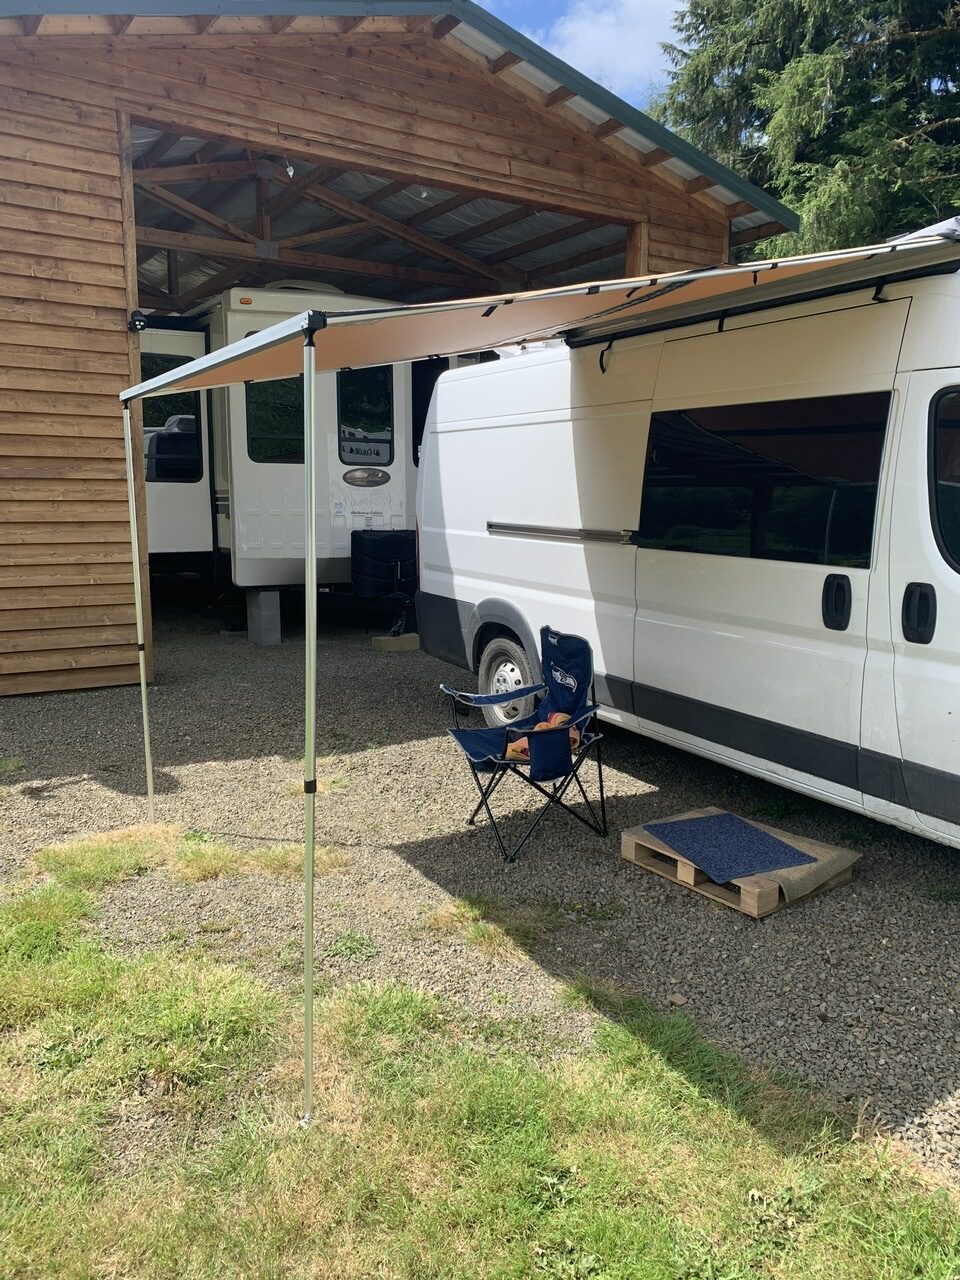
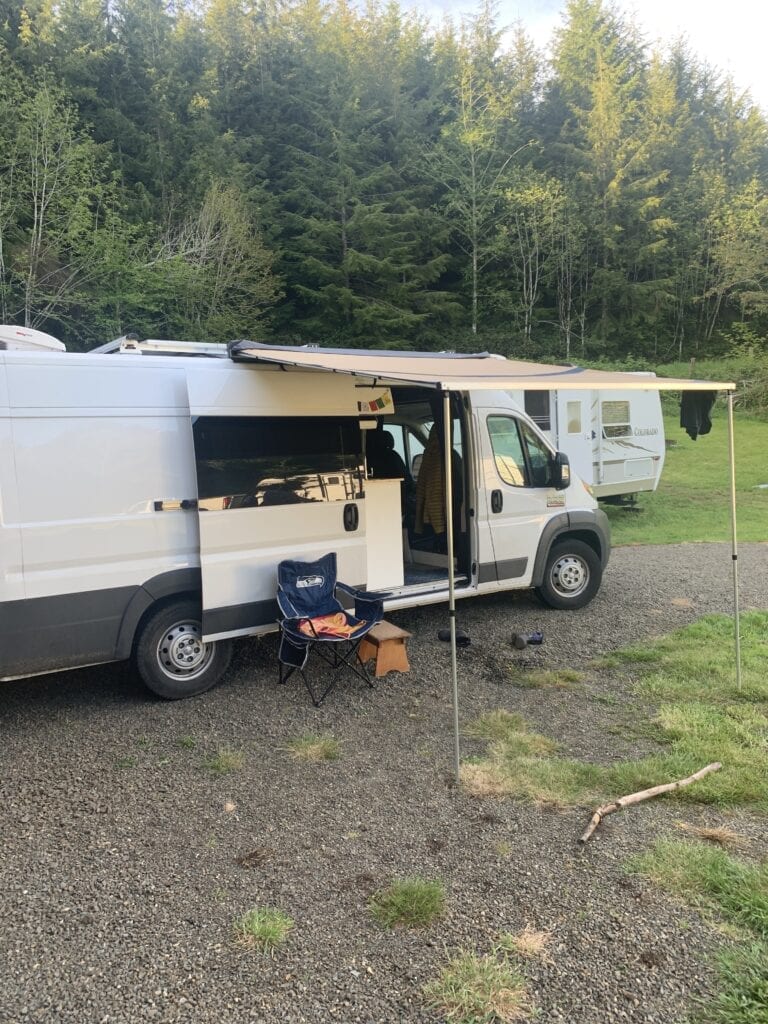
A van awning can allow you to utilize your camper van’s space to its fullest potential and maximize your enjoyment of van life.  Van awnings are perfect for both those who are setting up to camp for a week or for a night—they are quick and simple to set up and stow away on the outside of your vehicle maintaining a low profile

Many companies produce awnings for overland or 4×4 use and these translate well to van life whether you’re a serious off roader or a weekend camper.

These are all excellent reasons to buy a van awning, but some van lifers may find that it just isn’t for them.  If you’re planning on mostly stealth camping in urban areas or getting into van life on a strict budget you may want to hold off on buying a camper van awning.

If you’re ready to expand your van’s capabilities then dive in, we’re going to check out a few popular roof rack awning choices for all budgets and needs and help you decide which one is the best van awning.

Tuff Stuff Overland Rooftop Awning - 4.5’ x 6’ and 6.5' x 8'

Pros:

  • Inexpensive
  • Simple use and installation 
  • UV Protection
  • Shade wall and other upgrades

Cons:

  • The (4.5′ x 6′) size is small, good for only 1-2 people
  • Can pool water in the rain

Tuff Stuff specializes in overland equipment from roof racks to winches and offers this simple roof rack awning at a budget price. 

Like most of the awnings we’re looking at, the Tuff Stuff Rooftop Awning mounts to your existing roof rack with the provided L-brackets.  This allows for a simple and quick installation and doesn’t require you to have anything but whatever roof rack you’re already rolling with. 

The 4.5′ x 6′ sized awning provides nice shade coverage for one or two people and a small table around the doorway that you’re mounting it over.  The advantage of having a smaller awning like this is that you can mount it either over the side door of your van or over the tailgate.  You could even combine this smaller tailgate sized awning with an addition awning mounted on the side of your vehicle. 

The small size also makes it ideal as a car awning.  

Note that Tuff Stuff also offers a slightly larger roof rack awning, measuring 6.5’ x 8’, that is constructed out of the same materials and functions in the same manner. This provides quite a bit more room.

Tuff Stuff uses four aluminum poles to support the awning which is made from waterproof 280 gram polyester/cotton.  This polycotton is treated with a waterproofing material that sheds rain water and provides a durable and UV protected covering from the elements.  The lightweight poles can be tethered with guide ropes to help the awning withstand light guests of wind. 

Like most of these van awnings, this one is easy to set up and you can go from turning off your engine to sipping on your favorite beverage in the shade in a matter of minutes.

What about upgrades?

If you want to upgrade your Tuff Stuff Awning you’ve got options.  

The company sells a shade wall that also measure 4.5’ x 6’ as well as LEDs for lighting up your campsite.  The awning with the shade wall can fit together inside the awning driving cover making for an easy set up and break down.  These standard upgrades allow you to make the most out of the Tuff Stuff’s small size.

If you expect to be in more extreme environments often beware that the Tuff Stuff Overland Rooftop Awning doesn’t hold up to winds over 20mph and needs to have rainwater manually pushed off to prevent it from welling in the center and breaking the support poles.  The roof rack awning cover itself is tough though and keeps the awning safe while driving. 

Despite its small size and lightweight design the Tuff Stuff Rooftop Awning packs a punch for the price.  This camper van awning works well for those who are looking for just a little bit of extra room outside their van, a weekend warrior who enjoys a shaded campsite, or those on a smaller budget. 

Smittybilt Awning – 6.5’ x 6.5’

Pros:

  • Inexpensive
  • Simple use and installation
  • UV Protection

Cons:

  • Small size, good for 1-2 people
  • Pools water in the rain
  • No shade wall

Smittybilt has been producing off-road products geared for Jeep drivers for over 50 years. It offers another choice when it comes to a simple roof rack awning for a lower price.

This awning is very similar to the Tuff Stuff Overland awning in that it’s made of the same 280g polycotton and uses four aluminum poles to extend and support itself.  It also mounts to most roof racks and is solid as a camper van awning.

After checking out the Tuff Stuff awning we found that this awning doesn’t differ much except for it’s size.  You can expect the same easy set up and breakdown as well as enough shade for a couple of people, though of course the larger size of the Smittybilt provides more a bit more room.   It’s got UV protection, and is durable enough for all but the most extreme off roaders. 

The awning is good in the same situations as the others, from the campsite to the beach.

However, it also suffers from the same issues when it comes to wind and rain as most roof rack awnings.  It sits horizontal to the ground and can pool up rainwater. The stakes and guide ropes that Smittybilt provides offer some stability but in the end this awning isn’t designed to hold up in extreme winds.  

If you’re looking for a little more shade, or perhaps want to combine an awning over your van’s rear doors with one that covers the side doors, then this Smittybilt awning is a solid choice for your van conversion.

Thule Hideaway Awning – 10.7’ x 8’

Pros:

  • Rain runs off awning
  • Telescoping legs and crank winder
  • Highly durable construction
  • Large coverage
  • Many options for upgrades

Cons:

  • Expensive
  • Heavier than other options

Now we’re getting into the world of big and expensive camper van awnings.  

These are the awnings you see on the $100,000 4×4 Sprinters, the awnings that make you envy not only the van they’re attached to but also the shade they provide. 

But why would you want to spend five times more for a Thule Hideaway

Thule has been making vehicle accessory and storage products since WWII and is regarded as one of the most rugged and reliable brands on the planet.  If you haven’t heard of them or seen their products then you haven’t been paying attention on any major road.  The popularity of Thule is due to the reliability and build quality of their products.

Like the other options we’ve explored, the Thule Hideaway Awning mounts to most standard roof racks but it differs in many respects. 

  • Thule has designed an awning that unfolds itself and can be opened by one person in a manner of seconds.  This, of course, is handy in nearly every situation. 
  • The awning stores away in a well-constructed metal box, not a zippered canvas or PVC cover like other options.  This provides the durability that will make your awning investment last much longer. 
  • The telescoping legs mean you can set up the awning at an angle so that rain runs off the front, no need to deal with pooling water.

Thule also offers many upgrades, from guy lines to help the roof rack awning withstand higher winds to full on tent attachments; you can completely customize your awning.  All of this of course comes at an additional cost.

However, if you’re serious about the time you spend on your “front porch” then considering a Thule Hideaway Awning is worth your time. 

It should be noted though, that more durable construction and higher quality materials do not make your awning more structurally sound in high winds.  At the end of the day, a wind over 20mph will treat any van or car awning like a horizontal sail.  It’s important with any awning to tie it down properly or to refrain from using it in high winds.

Rhino-Rack Batwing Awning – 118 sq ft of coverage

Pros:

  • The largest awning available
  • Durable construction
  • Comes with stakes and guys ropes for wind
  • High quality material
  • Options to mount on left or right side of vehicle

Cons:

  • More complex set up and break down
  • Only fits on Rhino-Rack roof racks

Do you want your camper van awning to provide the most shade and outdoor space possible?  Then invest in a Rhino-Rack system. 

Rhino-Rack’s Batwing Awning only comes with mounts that will attach it to an already installed Rhino-Rack roof rack so be aware that if you want the coverage the Batwing provides you’ll need to buy into Rhino-Rack’s proprietary system.  If you do though, you’ll be blessed by a massive amount of shelter outside of your vehicle. 

The awning unfolds not only along the side of your vehicle, but around the rear where it reattaches to the Rhino-Rack roof rack.  This set up is solid and well thought out. 

While it doesn’t have telescoping legs or a crank like the Thule awning, the design is such that it can be set up or broken down easily by one person in a matter of minutes. 

Like the other awnings, the Rhino-Rack Batwing is made from high quality waterproof and UV resistant materials.  The awning’s legs are sturdy, adjustable, and lightweight.  Provided with the kit are pegs that function like tent stakes, further securing your van awning for the winds. 

Rhino-Rack claims that the awning can withstand a 2 meter block of water (think a six foot wave falling from the sky) so you know the awning is tough enough for even heavy rainstorms.  This is important and makes the Rhino-Rack Batwing an excellent choice for those looking for a van roof rack awning for overlanding or extended time off the grid. 

Nothing beats the Rhino-Rack Batwing in terms of sheer ground coverage.

ARB Awning – 8.2’ x 8.2’ (other sizes offered as well)

Pros:

  • Great value
  • Telescoping legs
  • High quality material
  • Large covering

Cons:  

  • Some complain of mounting issues
Van conversion arb awning
Van awning for van life

ARB is a powerhouse in the off-roading 4×4 world. They designed this awning for use in the Australian outback… 

which means it does that job of shade coverage very well. 

The awning functions wonderfully and provides a large shaded area for an affordable price range price. 

The advantage of using the ARB system is the telescoping legs that allow for height adjustments to prevent rain from pooling.  This feature sets it apart from the Tuff Stuff and Smittybuilt awnings, despite its similar appearance to these two awnings. 

This camper van awning comes with pegs and guy ropes to secure the legs and provides the same UV protection.  

ARB also provides optional LED lights with the awning and offers upgrades such as shade walls.  If you’re looking for a simple and affordable awning for your camper van life and live or travel in a rainy climate, this is the perfect awning for you. 

Want more details on the ARB awning, stay tuned because…

Full review of the ARB Awning coming soon!

Conclusion

If you are in the market for a camper van awning or are simply pondering the idea of van life, these are all solid van awning choices.  With the extra space and shade that an awning provides, everyone from the full time van lifer to the campground newbie can benefit from the addition of a van awning.

It is hard to pick the best van awning out of these five.

However, Colin is a firm believer in the ARB Awning and is working on a full review of it. He thinks that the ARB is the best van awning, what are your thoughts? 

Let us know what your favorite van awning is in the comment section so we can add it to the list. 

Want a cheaper option? Check out this DIY van awning!

Dometic Fantastic Fan Review – All Models + Maxxfan Comparison

dometic fantastic fan

This detailed review will cover all of the fantastic fan models, pro’s and con’s, and put the two RV vent fan front-runners in our Fantastic Fan vs Maxxfan matchup.

Sweating in a stinky camper-van or RV sucks.

Do you know what else sucks… but in a good way? 

Get your mind out of the gutter! 

I’m talking about the Dometic Fantastic Fan.

These roof vents boast a powerful fan to keep you cool and remove stale air from your home on wheels. And Dometic produces many other van life essentials, making them a well-known brand.

There are many different models of the Fan-tastic Fan, but not all are one click away from your doorstep. A lot of the models are OEM, meaning they’re only sold to specific RV or camper van manufacturers. Because of this, I’ll only cover the five Fantastic vent fan models easily available to you and me as well as how they might stack up against their biggest competitor, the Maxxair Maxxfan in our Maxxair vs Fantastic Fan matchup.

Table of Contents

However, if you want to skip over all of our hard work here and go check out the Maxxair Maxxfan review, here it is.

Fantastic Vent Fan - General Overview

Before getting into each model, let’s talk about the basics that apply to all five of Dometic’s Fantastic Fan models.

  • 12v / DC power
  • 12 inch, 10-blade fan
  • White base
  • High profile base
  • One crank arm supporting the dome
  • Fits standard 14” x 14” rv roof vent opening
  • Dome must be open at least 3” to turn on the fan

Let’s move on to the pros and cons.

Fantastic Vent Fan Pro’s

I don’t know about you, but I like to hear the good news first… 

All but one of the Fantastic Fans operates as a vent fan (sucking) or a ceiling fan (blowing). Either way, the fans move a lot of air. Because of the translucent dome, the vent fan doubles as a subdued skylight. Additionally, online reviews boast easy installation across the board.

Fantastic Vent Fan Con’s

Now, for the bad news. Many reviews complained about how noisy the Fantastic Fan is, especially at higher speeds. However, this might not be a deal-breaker for you. Only one lift arm supports the dome, making it far less stable in windy conditions and while driving. Also, operating these vent fans while it’s raining is not wise. In other words, keeping the dome open while it’s raining can result in a fried fan motor and soggy interior.

A Quick Look at the FAN-Tastic Vent Fan Features

 Fan SpeedsReversible Air FlowThermostatRain SensorAutomatic Dome LiftRemote
Fantastic Fan 1200
Check Price
3NoNoNoNoNo
Fantastic Fan 1250
Check Price
3YesNoNoNoNo
Fantastic Fan 2250
Check Price
3YesYesNoNoNo
Fantastic Fan 3350
Check Price
3YesYesYesYesNo
Fantastic Fan 7350
Check Price
14YesYesYesYesYes

Fantastic Fan Models

Fantastic Fan 1200

fantastic fan 1200

This is a bare bones camper vent, and all it does is vent (suck). As a result, this is the one and only Fantastic Fan on the list that doesn’t double as a ceiling fan (blow). The dome is manual lift and seals tight when lowered. It offers three speeds to meet your cooling needs.

Dometic Fanstatic Fan 1200CFMAmps
Low4781.86
Med6532.29
High9203.00

Fantastic Fan 1250

fantastic fan 1250

As you might have guessed by the model number, this Fan-Tastic Fan is almost the same as Model 1200. The only difference is the 1250 is a vent AND a ceiling fan. With the flip of a handy rocker switch you can go from pulling air out to pushing air in. All other specs are the same as the Model 1200. Anticlimactic, I know. 

Don’t worry, it gets better.

Fantastic Fan 2250

fantastic fan 2250

Take Model 1250, add a thermostat, and you have the Dometic Fantastic Vent Fan Model 2250. Although it doesn’t sound like much, a thermostat is a game changer. It maintains the temperature in your camper van or RV for you. All you do is select the fan speed and set the temperature control knob. After that, the thermostat does the rest. It monitors ambient temperature and cycles the vent fan on and off to maintain your desired temperature. This is a great feature for when you’re sleeping or if you need to leave pets inside.

Fantastic Fan 3350

fantastic fan 3350

This model adds two fancy features onto the 2250.

First, Fantastic Fan 3350 comes with automatic dome open/close switch. Don’t worry there’s still a manual dome-lift knob in case you need it. 

Second, the 3350 has a rain sensor! When the rain sensor senses moisture the dome automatically closes and turns off the fan. Thus, the fan motor and your camper van or RV interior are automatically protected from the rain. 

However, there is a catch.

When the rain sensor dries out the dome doesn’t reopen automatically. Therefore, the camper fan doesn’t restart automatically either. This can bite you in the butt. For example, let’s say you have the thermostat set to keep your dog cool while you go out for the day. A quick drizzle right after you leave could trigger the rain sensor, turning off and closing the vent fan. As a result, your dog is now stuck in a hot camper van or RV until you return. Not ideal.

If you’re willing to trade a wet interior (and a possible fried Fan-Tastic Fan) for your dog’s life, you can turn the rain sensor off. Additionally, you can use the manual dome lift knob to open the dome after the rain sensor secures the vent fan. This overrides the rain sensor which won’t reactivate until it has dried out.

Fantastic Fan 7350

fantastic fan 7350

This model spices things up a bit from the 3350. The Fantastic Fan 7350 has 14 fan speeds instead of a measly three! 

Because of the speed variability, the vent fan motor is more efficient. Therefore, it only draws 0.2 amps at the lowest speed and 1.9 amps at the highest speed. For those concerned about power, this is the van roof vent/fan for you!

Another fun feature of the 7350 is the wireless remote. With the remote you have all the controls at your fingertips without having to get up. 

However, there are some downsides to the remote. If the batteries die and you have no replacements, you’re shit out of luck when it comes to operating the vent fan. Some users complain about the signal from the remote not always registering with the Fantastic Fan. Additionally, the temperature control units are only in increments of 5°F. While not horrible, you lose the fine tuning of the manual knob. But speaking of manual knobs, the 7350 does still have the manual dome lift knob.

Dometic Fan-Tastic Ultrabreeze Vent Cover

fantastic ultrabreeze vent cover

Now, we’ve mentioned before that NONE of these models come with a rain cover and only TWO of them have a rain sensor.

If you want to protect your fan, and your camper van, from the rain, then the Ultra Breeze Vent Cover from Fant-Tastic Vent is your answer. They make the vent cover in white, black, and smoke grey so you can choose whatever color best fits your camper van or RV.

Fantastic Fan VS Maxxfan

There’s definitely two front runners when it comes to campervan and RV vent fans: Fantastic Fan vs Maxxair Maxxfan. People are going to have their own personal opinions on which one they like better, but since we have done a write-up on both, we feel confident enough to compare the two RV vent fans for you.


Maxxair vs Fantastic Fan Round 1
Fan Speed Comparison

Fantastic Vent Fan

All but one of the Fantastic Fans only have 3 speeds (the model 7350 has 14).

Maxxair Maxxfan

3 out of 5 of the Maxxfans have 10 speeds. Two models have only 4 speeds, which is still more than the Fantastic Fan’s 3 speed standard.

CONCLUSION

In our eyes it is considered better to have more speed settings. This allows you to run the fan at a slower, more efficient, speed as well as higher speeds for ULTIMATE COOLNESS. For this reason, we have to say that Maxxfan takes the cake.

Fantastic Fan vs Maxxfan Round 2
Fan Power Draw

Fantastic Vent Fan

According to the Dometic’s Fantastic Fan website, the fan draws 1.86 amps / hr on it’s lowest setting.

Maxxair Maxxfan

Across Maxxair’s 10-speed fans, they draw 2.66 amps while on the highest setting, and only 0.17 amps on the lowest. Wow.

CONCLUSION

It’s obvious here, but the Maxxfan is by-and-far the most efficient out of these two RV vent fans. This is partly due to the fact that Maxxair’s 10-speed settings allow you to operate the fans at a lower, more power efficient, speed. 

Fantastic Fan vs Maxxfan Round 3
General Operation

Fantastic Vent Fan

The fantastic fan needs a rain guard in order to be operated in the rain. However, some models do come with a rain sensor which automatically closes the lid when it senses rain.

Maxxair Maxxfan

The majority of the Maxxfans have a built in rain guard that allows operation during the rain.

CONCLUSION

The rain guard might not be a deal breaker for some people. I know many people in sunny-Colorado that went with the Fantastic Fan because it simply doesn’t rain that much.

Maxxair vs Fantastic Fan Round 4
Cost

Fantastic Vent Fan

The most basic Fan-tastic Fan model 1200 is just shy of $150 and their most “luxurious” model 7350 is just over $300. 

Maxxair Maxxfan

Maxxfan is a bit more expensive. Their base models usually run around $175 and their top end model can be anywhere between $400 and $500!

CONCLUSION

This is the main reason why Fantastic Vent fan is still a popular choice among vanlifers and RV enthusiasts… the price point. If you are going for a budget build, you can get the Fantastic Fan for a cheaper price than Maxxair. However, if you factor in the cost of the rain guard, they are pretty comparable.

Summary

Despite what the above Fantastic Fan vs Maxxfan comparisons hints at, if you’re looking for a RV fan or van roof vent, a Dometic Fantastic Fan is still a solid choice. They provide great airflow, are simple to use and affordable. On the other hand, if operating your vent fan while it’s raining is a must, or if you want the most energy efficient RV vent fan, you will probably want something like the Maxxair Maxxfan or invest in Dometic’s rain cover.

If you think you might be more interested in reading more about the Maxxair Maxxfan, check out this detailed review for more information.

The 8 Best Solar Showers – Camping Or Mobile Living

Camper van shower

A solar camping shower is an easy, affordable, and effective way to stay clean–whether you’re on the road living out of your van or just looking to clean up while at camp.

It’s simple, when you’re hiking or mountain biking the sun heats up the water. When you’re done with the day’s activities you have a hot solar shower waiting for you. And if it’s a cloudy day, heating up water on the stove and adding it to the shower reservoir is an effective alternative.

Before I get into each solar shower and their specs, I want to cover a couple things to keep in mind when selecting and using one.

Water Weight

When selecting a solar shower, many people think bigger is better. More water means a longer shower. Or more water means more people can shower.

Right?

While this is true, keep in mind how much water weighs. One gallon of water weighs about 8.34 pounds. Although this doesn’t sound like much, the weight adds up.

The first five solar camping showers on the list give you 5 gallons/20 liters of warm water. That’s almost 42 pounds of water you need to hoist above you to use the 5-gallon gravity-fed showers. However, if need capacity but can’t or don’t want to lift 42 pounds above your head, the last two solar showers are for you.

Solar Shower Heat

The typical 5-gallon solar shower takes about three hours to reach approximately 100°F in direct sunlight. But be careful. Sometimes solar showers get too hot. Always test the water before showering and add cold water if needed.

On the other hand, once the solar shower is in the shade, it loses heat rather fast.

Like 5 °F or more per hour fast.

It’s best to use them straight out of the sun. Although this isn’t related to heating the water, all the showers listed are for just that – showering. They are not for storing drinking water unless specified otherwise.

If you don’t think a solar shower bag is for you, check out our post “15 Public Shower Options Near You.

Coghlan's solar shower

Coghlan’s hallmark green packaging with yellow lettering is synonymous with camping gear. One of their products happens to be a 5-gallon solar camp shower. 

For those of you looking for a PVC-free shower, Coghlan’s delivers. With the black shower bag comes with a hose, hose clamp to control flow, and a 1” diameter showerhead. One side of the bag is clear, and that’s the side you place up in the sun. It weighs a mere 10 ounces and packs down small.

This simple solar camp shower has its downsides. The hose clamp slows the flow to a trickle instead of stopping it completely. Additionally, the long hose makes it hard to keep unkinked. 

Lastly, the fill port is small, and it’s a push-in cap, not a screw cap. As a result, the cap is susceptible to warping in the sun and leaking. There are even complaints of it popping off during transport and use. However, this no-frills solar shower is a cheap option for van life, and it get’s the job done.

DOTSOG portable solar shower

At first glance, the DOTSOG solar shower bag is quite similar to Coghlan’s. But there are notable differences. The DOTSOG is PVC and claims it can reach 113°F in three hours. It also includes a PVC tube to put above the carrying handle for added support. 

The showerhead doesn’t appear to be much bigger than Coghlan’s. However, it does come with an on/off valve that is an improvement over a hose clamp. Unfortunately, the valve location is at the outlet of the bag instead of at the showerhead.

VIGLT camping solar shower

The VIGLT camping shower is a step up from the DOTSOG, giving you more features. The front of the solar shower bag sports a mesh pocket to stash travel-sized toiletries while you shower. Additionally, the carrying handle is sturdy, made of webbing strap with a plastic grip. The handle also has a side release buckle, making this solar shower easy to hang without additional rope.

There are also subtle yet major differences between the VIGLT and the previous two camping showers. The fill port has a screw-on cap, making it less prone to leaking. And the fill port appears to bigger as well. 

Additionally, the showerhead is wider. The flow control valve is also conveniently located at the showerhead. Another neat feature is the built-in temperature gauge on the back of the solar shower bag.

Summer solar shower

The Advanced Elements solar shower looks like a silver VIGLT with some key improvements. The front side of the bag is 4-ply with a reflective and insulating layer. Also, the handle grip is rubber not plastic. However, one of the biggest differences is the flow control. Instead of a simple valve, you push or pull the showerhead to control flow.

Advanced Elements also has a PVC-free version of their 5-gallon camp shower that comes in black. Additionally, they have two smaller silver PVC solar showers. You can choose from a 2.5-gallon or 3-gallon capacity. 

Outdoor Hygiene 5 gallon solar shower

As far as the 5-gallon solar camping showers go, I saved the best for last. The Outdoor Hygiene solar shower is made of food grade TPU. Therefore, you can use it as both a shower and water bladder. I bet that’s why it’s the only bag shower with click-on hose connector. 

Additionally, it sports a wide fill port with screw-on cap like that of a Camelback. As a result, this is the only 5-gallon solar shower listed that’s easy to clean.

The shower nozzle of the Outdoor Hygiene looks like a cross between a kitchen sink side sprayer and garden hose nozzle. However, this design makes for easy one-handed operation. This shower bag does not come with a built-in thermometer, but I find the other features make for it.

sea to summit pocket solar shower

This is the smallest and lightest solar shower available coming in at a little over 5 ounces. The Pocket Shower is a great addition to your campervan that you can also take backpacking. But it only has a 2.5-gallon capacity. 

The solar shower bag looks like a waterproof stuff sack with a little showerhead on the bottom. Therefore, the bag opening is like that of any roll-top bag, making it the easiest to fill and clean.

Controlling the flow of the camp shower is as simple as twisting the showerhead. The biggest drawback is the small showerhead clogs easily when using natural water sources. Another complaint is that it’s easy to overtighten the showerhead. Overtightening pinches and warps the o-ring, resulting in leaks.

nemo helio pressure solar shower

The Helio is one of two pressurized solar showers on the list. Instead, it comes with a foot pump to deliver pressurized water. Pump to pressurize the “tank” before showering and occasionally give it a few more pumps to maintain pressure. The tank is PU coated polyester, meaning you can pack it down for easy storage. The shower nozzle is like that of the Outdoor Hygiene and attached to a 7-foot hose.

The regular Helio gives you 2.9 gallons. The tank sits on the ground lengthwise on four plastic feet. One end cap is clear, allowing you see the water level in the tank. The fill port has a push-in cap. The Helio LX has twice the capacity of its little brother with a whopping 5.8-gallon capacity. 

Unlike the regular Helio, the LX sits upright on one end when in use. The fill port is on the other end with a screw-on cap that looks like that of a water bottle.

Yakima road solar shower vehicle mounted

The RoadShower is a tube-like pressurized solar shower designed for mounting on a vehicle roof rack. They offer three different capacities: 4, 7 and 10 gallons. The tanks are made of aluminum, making them the most durable solar shower on the list. They have a large top cap for easy filling. Each end has a water outlet, and the tank has a stick-on thermometer. The RoadShower also comes with a hose and spray nozzle.

There are two ways to pressure the tank. One, with a Schrader valve, which is the same air valve found on many bicycle tires. Two, with a garden hose. This allows you to fill the tank while pressurizing it. But don’t worry, the tank comes with a built-in relief valve that automatically opens at 65 psi to prevent overpressure.

The RoadShower’s vehicle mounting is both good and bad depending on how you look at it. Because it’s mounted on your vehicle, there’s no set up and no hoisting of a heavy solar shower bag above your head. 

On the other hand, you must park your vehicle in the sun to get hot water. For those with roof-top solar panels, this is a moot point. But if you want to keep your vehicle cool in the shade and still take a hot shower, the RoadShower forces you to choose one or the other.

Which is the Best Solar Camping Shower?

That answer depends what your needs are and how much you’re willing to spend. The gravity-fed bag showers are an inexpensive and portable way to meet your showering needs. They provide a large enough capacity for multiple people if using the on/off shower method. Additionally, they pack down small for easy storage. 

If you’re looking for more pressure or don’t want to hoist a heavy bag over your head, the Helio is a great choice. It’s packs down well and gives you added pressure with less fuss. But the RoadShower is another convenient pressurized shower that’s sure to last with its robust construction.

So, the real question is which one works best for you?

And if you arn’t into solar showers, maybe you would rather bathe in a public shower?

Maxxair Maxxfan Review – All Models (2022)

maxxair maxxfan

Maxxair Maxxfan is often considered the most popular RV vent fan on the market, and for good reason. In this review we will take a deep dive into the 5 most popular maxxfan models, their specs and power consumption, and stack them up against their biggest competitor in our Maxxair vs Fantastic Fan Challenge.

Do You Even Need a Vent Fan?

Do you really need a Maxxair Maxxfan? Or any RV roof vent at all? Well just imagine that…

It’s been a long day hiking and you get back to your camper van to find out that the shade you’d parked in has vacated…

It’s been hours since your home on wheels has been sitting out, baking under the hot afternoon sun.

Or, were you out mountain biking and needed to leave your camper van’s solar panels in the sun to recharge after your Strava speed run?

Or maybe you’ve been sitting in some café in Sedona working while your van has been sitting out under the blazing desert sun. 

Whatever the situation, anyone who lives the van life will need to park under the warm sunlight at some point and we all know what it’s like to get back into a hot car after a long day of work or play. 

It isn’t fun

That’s where the Maxxair Fan comes into play.

The Maxxfan is the leading van roof vent on the market, and there’s a good reason for this.  Most of the products from Maxxair offers the ability to blow air up or down, and while it may not seem like much, this makes a huge difference for someone living in a small space.  We talked about scenarios where you might want the fan to blow air down into your camper van, ie: when it’s too hot inside and you need to circulate air quickly.  But there are plenty of other times people living the van life may want to use a RV vent fan. 

What happens when you cook a curry meal only a few feet from your bedding? 

Or when you spend ten minutes on your composting toilet while your partner brews coffee? 

Or when… well you get the point. 

There will be times when you want to air inside of your van to leave.  There’s no better way of doing this efficiently and discreetly than the Maxxair Maxxfan.

Now, let’s get into the different models and specs, as well as how the fan stacks up in the Maxxair vs Fantastic Fan challenge. 

If you wan’t to skip to the FULL Fantastic Fan Review, head over here. (We suggest you finish this review first!)

Table of Contents

The Maxxfan Deluxe

This is Maxxair’s top of the line rv roof vent and fan. As their website states, it is the only RV fan on the market that includes a built in rain guard vent cover. With the Maxxair Deluxe you can ventilate your camper van conversion, even in the rain, at a rate of 900 cubic feet per minute (CFM).  

That’s a ton of ventilation.  

To put that in perspective, the Home Ventilating Institute recommends a ventilation system of 50 CFM for a 1000 square foot home.  The Maxxair Deluxe provides nearly 20x that rate of ventilation, if you want to turn it to max, of course.  Even on the lowest setting, a Maxx air fan will offer 274 CFM of airflow.  

It’s also mad quiet and will run off very little power. 

Maxxair offers four models of the Maxxfan Deluxe – the 5100k, 6200k, 7000k, and 7500k models are the ones you want for your ideal cargo van roof vent fan.  All of these models offer both intake and exhaust features, allowing you to blow air either out or into your camper van, and at 10 different speeds.  

Of course they all come with the rain guard vent cover, and all fold down to a low profile.  You can use these RV roof vent fans when they’re folded down as a sort of built in ceiling vent to allow for air circulation as well.

MaxxFan Deluxe 5100K (WHITE) and 6200K (SMOKE)

DOES HAVE

  • MANUAL CONTROLS
  • RAIN SHEILD
  • THERMOSTAT
  • BLOW & SUCK (hehe)
  • 10 SPEEDS

DOESN’T HAVE

  • REMOTE CONTROL
  • ELECTRIC LID CLOSE/OPEN

MaxxFan Deluxe 7000K (WHITE) and 7500K (SMOKE)

DOES HAVE

  • MANUAL & REMOTE CONTROLS
  • RAIN SHEILD
  • THERMOSTAT
  • BLOW & SUCK 
  • 10 SPEEDS
  • ELECTRIC LID CLOSE/OPEN

DOESN’T HAVE

  • REGRET
  • THIS FAN HAS NO REGRETS

There are additional benefits of the Maxxair Deluxe 7000k, including a remote control with a wall mount, temperature control that allows the fan to act as an air conditioning unit, and two support arms allowing you to use the fan in high winds or while driving. 

These features, along with the built in rain guard set the Maxxfan Deluxe apart from the competition.  In fact, we can go as far as saying that the rain guard itself makes the Deluxe worth the money.  Having proper moisture control in the rain is key and no other product on the market can do what this rv roof vent fan does—ventilate air even in a downpour.

While at first it may seem like all fans are created equal, this is not true.  A simple and often overlooked aspect of the perfect camper van conversion build, having a reliable and effective ventilation system is hugely important.  This is why we recommend the Maxxfan Deluxe, as it gives the user the most versatility in ventilation.  

You can literally use this RV vent fan at any moment, and its power draw is so small that you can run it all day and night with a solar set up.

One of the largest benefits of the Maxxair Fan is it’s low power draw.  The Maxxair Deluxe 7000k draws only 2.66 amps of power while on the highest setting and 0.2 amps of power on the lowest setting. To put this in perspective,

You could run a single Maxxfan Deluxe off of a standard camper van 100watt solar panel and a deep cycle battery 24/7, all summer long. 

A quick rundown on roof vent usage...

Brought to you by Paradigm Van Conversions

Trying to conserve battery power, but still want to run your roof vent? A quick physics lesson may help you manage your usage!

The fan affinity laws expresses the relationship between electrical power and speed such that power is equal to the cube (^3) of speed. 

So what does that mean? 

It means that if you reduce your fan speed from 100% to 80%, you use approximately 50% less energy. 

maxxfan electricty and power usage

The graph shows the power draw of a MaxxAir Deluxe fan across it’s 10 different speed setting, and you can see that the power draw is not a linear 1:1 relationship. The efficiency of the fan gets dramatically worse at higher speeds.

So, the takeaway is this: Simply avoid speeds above 80% as much as possible and you will effectively double the run time of your fan. If you are trying to decide on what kind of fan to buy, consider one with variable speed, not just for comfort reasons, but for energy efficiency reasons.

Happy camping!

Paradigm Van Conversions

Of course, the Deluxe model may not fit into everyone’s price range, but Maxxair offers other fans as well. Enter, the Maxxfan Plus.

The MaxxFan Plus

Budget conscious van lifers can choose the Maxx fan Plus, which offers many of the features of the Deluxe—exhaust and intake, 10 speeds, and easy installation. The 4500K model even comes with a remote control, electric lid opening, and a rain sensor (NOTE: Not a RAIN GUARD. The rain sensor is supposed to sense the rain, turn off the fan, and close the lid to protect the inside of your camper van)

The MaxxFan Plus 4000K (WHITE)

DOES HAVE

  • MANUAL CONTROLS
  • THERMOSTAT
  • BLOW & SUCK (hehe)
  • 10 SPEEDS

DOESN’T HAVE

  • RAIN SHEILD
  • REMOTE CONTROL
  • ELECTRIC LID CLOSE/OPEN

The MaxxFan Plus 4500K (SMOKE)

DOES HAVE

  • MANUAL & REMOTE CONTROLS
  • RAIN SENSOR (NOT GUARD)
  • THERMOSTAT
  • BLOW & SUCK (sorry, still doesnt get old)
  • 10 SPEEDS
  • ELECTRIC LID CLOSE/OPEN

DOESN’T HAVE

  • RAIN GUARD

The Regular Maxx Fan

Last in the line of these Maxxair fans is the plain ol’ regular Maxxfan. It only offers exhaust, and neither of the models have the thermostat or rain guard.  

Other companies offer similar products, such as the popular Fantastic Fan, but these products also fall short of what the Maxxfan Deluxe offers.  However all the Maxx air fans, and fans such as the Dometic Fantastic Fan, fit into one standard 14”x14” opening.  

This means that you can always upgrade to a higher end RV vent fan later in your van life journey. Here’s the spec’s on the regular Maxx fan. Please note, the only difference between the two models is the color scheme.

MaxxFan 4301K (WHITE) and 4401k (SMOKE)

DOES HAVE

  • MANUAL CONTROLS
  • 4 SPEEDS ONLY
  • EXHAUST ONLY

DOESN’T HAVE

  • NO RAIN GUARD/SENSOR
  • NO INTAKE FAN
  • NO REMOTE CONTROL
  • NO THERMOSTAT

There is also one less talked about model of the Maxx air line of rv roof vents that is basically just the Regular Maxx Fan, but with a rain guard. This model is the MaxxFan Deluxe Model 5301K and 6401K (only difference, again, is the color). We put this fan down in this section, even though it sports the “Deluxe” title, because it has such basic features.

MaxxFan 5301K (WHITE) and 6401K (SMOKE)

DOES HAVE

  • MANUAL CONTROLS
  • 4 SPEEDS ONLY
  • EXHAUST ONLY
  • RAIN GUARD!

DOESN’T HAVE

  • NO INTAKE FAN
  • NO REMOTE CONTROL
  • NO THERMOSTAT

A Quick Review of the Specs

That was a lot to take in, so here’s one more chart that put’s all the Maxxair Fan features and specs together:

maxxair maxxfan chart

Maxxair vs Fantastic Fan

It is pretty obvious that Maxxair and Dometic (Fantastic Fan) are the leaders in the RV vent fan industry, but how do they stack up against eachother?

Now we went into a bit more detail over on the Fantastic Fan Review (found below) but we will summarize the differences between the Fantastic Fan vs Maxxfan here.

Maxxair vs Fantastic Fan in PRICE POINT

Now this might be the only thing the Fantastic Fan hands-down beats the Maxxfan in… price point. When you do a side by side in the models, you can typically get the Fantastic Fan anywhere from about 15-35% cheaper than the Maxxair.

For example, check out the prices of each of the company’s top-of-the-line models.

Fantastic Fan 7350

Fantastic fan vs Maxxfan

Maxxfan 7500k

maxxair vs fantastic fan

Now, of course if you factor in the cost of the additional rain guard (for the fantastic fan), this difference in price starts to dwindle. Also note that the more basic models of each brand are more similar in price.

Fantastic Fan vs Maxxfan in SPEED CONTROL

Speed control is one thing that Maxxfan reigns supreme over the Fantastic Fan. 3 out of 5 of the maxx fan’s have 10-speed, the other two have 4-speed. The Fantastic Fan, on the other hand, only has one fan that has more than 3-speeds, and that’s their model 7350.

Maxxair vs Fantastic Fan in POWER DRAW

Again, the maxxfan wins this one. On their lowest setting, the fan uses only 0.17 amps / hr on it’s lowest setting! Compare that to the WHOPPING 1.86amps/hr that the Fantastic Fan uses on it’s lowest setting and it’s clear to see who wins this Maxxair vs Fantastic Fan matchup.

Fantastic Fan vs Maxxfan WRAP-UP

A final note is that NONE of the fan tastic fans come with a rain guard. None. 

You have to buy that separately. 

Now, for people doing a budget build (and don’t plan on being anywhere that rains) then I would recommend the Fantastic Fan.

For everyone else, I’d go with the Maxxair Maxxfan. 

Conclusion

Overall, we believe the Maxxair Maxxfan is the best van roof vent. No other fan is going to do what the Maxx fan Deluxe does, working in any condition and on such a small power supply. Nor will any other fan be as reliable.  

Like many things in a good van build, it is worth it to spend the extra money on important components and one should not overlook the importance of ventilation and air flow.

However, if you are looking for a more budget-friendly option and plan on being in drier climates, go check out our Dometic Fantastic Fan review below.