What is the best way to go about your van insulation?
Well… that is going to be an ever-ongoing debate within the vanlife community and van builders alike. We won’t claim to know everything about van insulation. However, we hope you can find this guide useful in deciding how to insulate your cargo van.
Campervan Insulation
Insulating a van is one of the most important aspects of your build. In fact, insulation is an important aspect of building any area as a space for living.
Living in a van is a lot like living outside—you’re at the whim of the elements. With proper van insulation you will be more comfortable inside your home-on-wheels no matter what’s going on outside.
There is so much information out there regarding what is the best way to insulate a van… and it’s daunting to sift through. From materials and R-values to types of heat transfer and whether or not you should use a vapor barrier, we have you covered.
Let's Talk About Heat

This is where we need to begin. Whether you’re trying to keep heat in or out of your campervan you need to understand the basics behind heat transfers.
Heat will transfer in or out of a material (ie: your van’s exterior) in three ways—radiation, conduction, and convection.
- Radiation is the transfer of heat through the atmosphere. This is the warmth you feel from the sun. Heat radiation will pummel the windows of your van on a hot day, and it’s easy to feel the effects; we’ve all been inside a car sitting in a parking lot on a warm summer day. Radiated heat comes through the windows, so the simplest solution to keeping this heat out is to use reflective window coverings that repel the radiated heat. The opposite can be done as well; you can use reflective surfaces inside your vehicle to conduct the radiated heat when it’s cold outside.
- Conduction is heat transferred through a surface—this is what happens when the walls of your vehicle warm up due to radiated heat. The heat transfers from the outside to the inside, warming the interior of your van. When choosing how to insulate a van you need to account for the areas where conduction will take place. Insulating these areas, the walls of your van, will cut down on the transfer of heat in or out through your van’s walls.
- Convection is when hot air rises and cool air falls inside an enclosed space. Insulating your ceiling, and blowing hot air out through a roof top fan will cut down on convection inside of your camper van.
These three forms of heat transfer can never be nullified, but with proper insulation you can drastically slow the transfer of heat through your van. Simply put, the R-value of your insulating material stands for resistance, as in how well that material resists heat transfer.
Where To Put Your Van Insulation
This may seem obvious, but there are nuances to where you should put your van insulation.
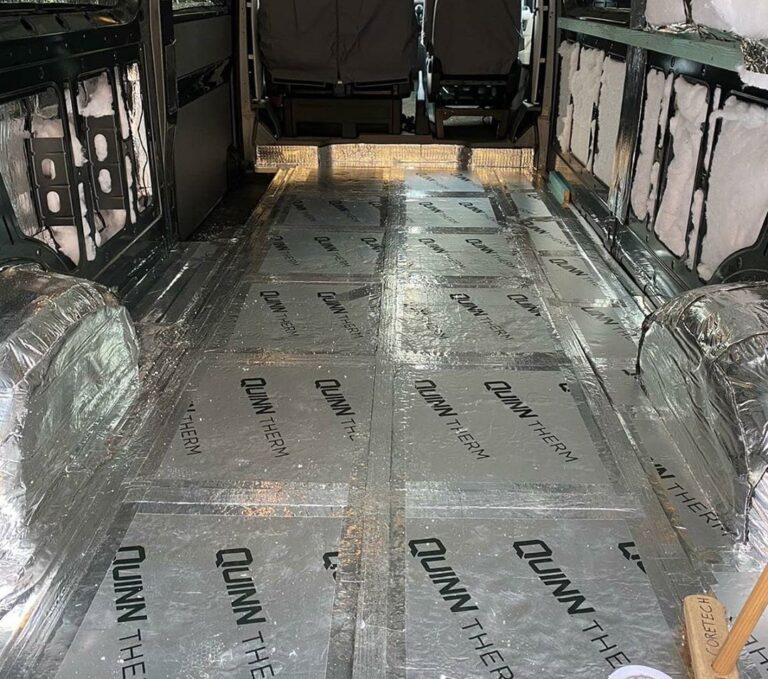
Of course, the walls and ceiling are most important, but if you’re planning on camping or living in your van in a colder climate you should definitely consider adding van floor insulation as well.
All of this also depends on the type of campervan you are insulating — do you have a cargo van with no windows, or is yours a passenger type van?
For those with cargo vans and the like, the choice is simple: you want to insulate everything. If you have a lot of windows, you may consider covering some of them permanently and insulting the van that way.
This all comes down to personal preference and the overall plan you have for your van.
Check out our article on camper van floor plans if you need help getting started with a plan.
If you know what you want and where you’re going to be staying, the choice of what to insulate will start to become clear. In general, the more insulation, the better your temperature control inside your home on wheels will be.
Vapor Barriers
Perhaps now is the best time to talk about vapor barriers and whether or not you need one.
A vapor barrier, like this one, essentially acts as a physical barrier that prevents moisture or condensation from getting into the insulation behind your vehicle’s panels.
Moisture can cause nasty things like mold and rust, but not all insulation materials will absorb moisture from the air, and some even act as their own vapor barrier. If you’re using a moisture absorbing insulation then you may want to put up a vapor barrier to keep it dry but keep in mind that this is very difficult to accomplish and is not a permanent solution.
The idea behind a vapor barrier in regards to campervan insulation is to physically block the water molecules from being able to reach the van’s insulation. This is much easier said than done, as really no vapor barrier is going to be perfect in a van build. Also, an imperfect vapor barrier might even prevent the moisture that does get to the insulation from evaporating… trapping it and causing those nasty mold problems that everyone dreads.
We recommended against using insulation that needs a vapor barrier. The best way to prevent moisture from collecting within or around your van insulation is making sure that you have plenty of airflow within your camper van. If air flows well it can reduce or negate the need for a vapor barrier… and air flow is much easier to accomplish.
Camper Van Insulation Materials
Choosing the correct insulation material for your van conversion is one of the most important factors when you set about insulating your van. Different materials work well in different spaces and familiarizing yourself with the types of material and how they relate to the inside of your van will help you decide what is the best way to insulate your cargo van.
There are a myriad of choices and considerations when it comes to choosing the materials for your van’s insulation. Logically, your best choices are going to be ones that have a high R-value, are within your budget, and are resistant to mold and mildew so they don’t lead to a moldy rusty nightmare in your living space.
Here are some of the most common insulation materials people choose when insulating a van, their pros and cons, and also their recommended usefulness.
Foam Board Insulation
Foam boards are quick and easy to install, have high R-values, resist moisture, and are affordable and easy to find.
These are the squared off foam boards that you see in any big hardware store. Typically, one side of a foam board is covered in a reflective material that can be used to dispel radiated heat if you install them with a small air gap between the board and your van’s walls. However, double sided reflective foam boards (or even no reflective material at all) can be found.
That being said, you need to take time to minimize the chance for moisture to get between the board and the van’s wall. This could cause mold, mildew, and perhaps worst of all, rust.
Foam boards come in a range of thicknesses (which effects the R-Value) and are rigid but the thinner ones can be bent slightly. They work best against flat walls, or as van floor insulation as they compress well. These qualities are shared by all foam boards, but not all foam boards are created equal.

Polyisocyanute (Polyiso)
Polyisocyanute (Polyiso) foam is often thought of as a good choice when it comes to insulating your van in an environmentally friendly manner. The production process used in polyiso foam does not include harmful emissions. An added benefit is that polyiso foam has the highest R-value per inch out of all foam boards, but this comes at a slightly higher cost than other foam boards.
Polyiso is still an affordable option and relatively easy to find locally. While it is easy to install, you should be sure not to leave any pockets of air between your insulation and the van’s walls. This can create a trap for moisture that would otherwise be repelled by the moisture resistant polyiso.
Pro's
- Good for flat walls or van floor insulation
- Cheap and readily available
- High R-value
- Environmentally friendly
Con's
- Does not work well in very curved or tight spaces (doors)
- Can squeak during driving due to rubbing on the van’s surface
- Can possibly trap moisture between the foam boards and the van’s wall.
XPS Foam Boards or Extruded Polystyrene
XPS Foam Boards or Extruded Polystyrene is another option for those who wish to use foam for their camper van insulation.
Unlike polyiso foam, XPS is manufactured in a way that releases hydrofluorocarbons (HFCs) into the atmosphere. HFCs are industrial chemicals whose gas byproducts contribute to climate breakdown. Some manufacturers are moving away from using HFCs as their blowing agent in foam construction, and hopefully this will phase it out in several years. Check the manufacturer’s safety data sheet (MSDS) to see if the foam you’re considering uses HFCs.
XPS foam is a bit cheaper than polyiso foam, but has a slightly lower R-value. If you’re going for the most budget friendly van insulation then this would be a decent choice, but we see no other reason to use XPS foam in your van build. For just a little more money you can have a higher R-value, and less environmental concerns, by using Polyiso foamboards instead.
Pro's
Good for flat walls and van floor insulation
Easy to use and readily available
Budget friendly
Con's
- Does not work well in very curved or tight spaces (doors)
- Less environmentally friendly if it uses HFCs
- Lower R-value than polyiso
- Can squeak during driving due to rubbing on the van’s surface
- Can possibly trap moisture between the foam boards and the van’s wall.
Expanded Polystyrene Boards (EPS foam boards)
Expanded Polystyrene Boards or EPS are the white, Styrofoam like packaging boards used as disposable cooler or in refrigerated packaging.
These boards are some of the lightest insulation you can find as they’re made from 98% air. They’re common in construction just like the other foam boards we have listed here. Again, their rigidity makes them well suited for the same spaces in a van: flat walls and van floor insulation. These can be bought as insulation in any big box hardware store, but have lower R-values than the other foam boards we’ve discussed here.
They also are less water resistant due to their non-closed cell construction and can lead to mold and mildew problems in a van. However, they are the cheapest of the foam boards, making them a very budget-friendly option for your campervan insulation.
Pro's
Cheapest foam board,
Easy to use and readily available
“Greener” than XPS foam (no HFCs)
Con's
- Does not work well in very curved or tight spaces (doors)
- Can absorb moisture
- Lower R-value than polyiso
- Can squeak during driving due to rubbing on the van’s surface
Batt Insulation For Vans
Batt insulation is a pre-cut roll of insulating material. Batts and rolls can be made from various materials, each with their own properties, benefits, and cons.
The main advantage of batt insulation is the ease of installation—simply unroll your insulation and place it where it needs to go.
Depending on the type of batt you choose for your campervan insulation, you’ll have to pay attention to a few important factors.
Batts work best along walls, ceilings, floors, and some can even be compressed or ripped to fit and stuffed into the smaller and harder to reach spaces in your van, like the ribs and doors. Some batt insulation materials are water resistant while others might hold onto moisture. Keep this in mind when choosing insulation for your van.
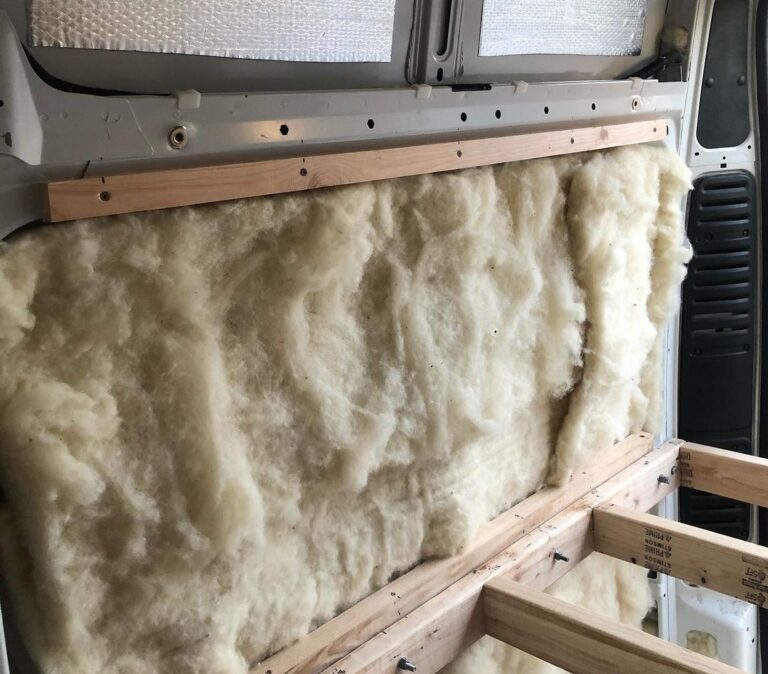
Sheep’s Wool

It has several key advantages over other batt insulations including that it’s non-toxic and water resistant. This makes for a super easy install, as you won’t need to wear protective clothing or worry about hazardous particles living behind the panels of your van. Its water resistance keeps the wool from absorbing condensation and keeps your van dry.
Wool has a relatively good R-value of 3.6 per inch of thickness, making it comparable to the foam boards mentioned previously. It’s perhaps the easiest insulation to work with and indeed one of the most environmentally friendly (hell, it’s compostable).
Sheep’s wool insulation does come at a higher price, however, and (for now) can only be purchased on the internet. Wool can be purchased in both batts and loose forms, making it ideal for any surface inside of your camper van, from behind door panels to the ceiling. Wool batts have the additional benefit of providing more sound-deadening than other forms of insulation. This is a nice way to reduce road noise in your van.
Pro’s
- Repels moisture
- Non-toxic and compostable
- Easy to install
- Good R-value
Con’s
- More costly than other insulation
- harder to find locally

Credit: justavanride
Rock Wool
Rock Wool, or mineral wool, is made from Basalt and recycled steel slag.
This material compound is water resistant but vapor permeable. This means that water vapor in the air can pass through it. This aspect is ideal when it comes to insulating a small living space that contains condensation.
Unlike sheep wool, rock wool can be dangerous to install unless you take the proper precautions. A mask, eye protection, and gloves are highly reccomended to make sure you don’t get fibers inside your body or on your skin.
It has an R value of 3.0 – 3.3 per inch and like other batt insulations can be used in nearly every part of your van.
Pro’s
- Water resistant and vapor permeable.
- Easy to find at nearly any hardware store
- Good R-value
Con’s
- Must wear protection when installing
Recycled Denim Batts
Recycled Denim batts have many of the same qualities as sheep’s wool—they are easy to work with, non-toxic, biodegradable, and have a solid R-value of 3.5 per inch.
Denim is cheaper and easier to find than wool batts, but this comes at a cost for van lifers… denim absorbs water.
If you choose to go with denim for your camper van insulation you’re either going to need to create a vapor barrier or make absolute sure that your insulation will be able to dry itself out.
For this reason, we can’t recommend using recycled denim unless you’re planning on being in a dry environment most of the time and also have excellent airflow inside your van.
This doesn’t mean that denim doesn’t have its uses; I personally chose recycled denim for reinsulating my Volkswagen Vanagon as my van has two roof vents, many windows, and I spend my time in sunny California.
Pro’s
- Non-toxic
- Easy to find
- Easy to install
- Afordable
- Good R-Value
Con’s
- Absorbs moisture
Fiberglass Batts
Fiberglass Batts are made of… well, fiberglass. That means that you won’t want the microscopic particles getting into your lungs or eyes while installing them. This also means that they’re cheaper to buy than other forms of batt insulation and produce relatively the same R-values, 2.9-3.8 to be exact,
depending on the density of the material.
Fiberglass batts can be found at nearly any big box home improvement store. The nature of the material does not allow it to absorb moisture, but it does hold moisture between the fibers. This can lead to, you guessed it, mold, mildew, and rust.
If you’re considering fiberglass insulation for your van insulation, know that you will need personal protective equipment during your installation. You should also seriously consider a vapor barrier unless you’ve got a well ventilated van in a dry environment.
For these reasons, we can’t recommend fiberglass insulation in vans despite its affordability and availability.
Pro’s
- Affordable
- Easy to find
- Good R-Value
Con’s
- Contains hazardous materials
- Traps moisture
- Must be installed with protective equipment (masks and gloves)
Spray Foam Insulation

Spray foam insulation can vary widely in price, hazardousness, and effectiveness. Spray foam
comes in two categories, open cell and closed cell.
The difference between the two is the difference in the distance between insulating particles.
Closed cell is denser, more rigid, and has a higher R-value than open cell. Closed cell insulates with an R-value range of 6.5-7 while open cell is more comparable to batt insulation with an R-value of 3.3-3.8.
The quality of the insulation is also reflected in the price, as open cell is considerably cheaper than closed cell spray foam. Even so, spray foam will cost more per square foot than the other forms of insulation and also requires a more detailed installation than batts or foam panels.
Closed cell and open cell insulation both have the advantage of filling in any and all gaps inside your van conversion. Spray foam is by far the most effective insulation in terms of fully coating the interior of your
van, and has the added benefit of providing excellent sound deadening. Closed cell insulation will weigh
more than open cell, but also acts as its own vapor barrier.
Many professional builders use spray foam as their primary van insulation.
Pro’s
- Highly effective
- Easy to find
- Good R-Value
- Fills any space
Con’s
- Requires careful installation
- Very expensive
If you’re going to go the spray foam route for your van insulation, you will need a lot of it. You might find the best bulk deal online versus in a hardware store.
Should You Insulate Your Van's Floor?

This question comes up often, whether you are doing a Sprinter van insulation or turning your cargo van into a weekend warrior rig. The answer is relative to what your needs are.
Are you staying in a particularly cold climate or are you trying to keep your van temperature down in hot weather?
If the answer is the former, you may want to consider adding in van floor insulation. No one likes stepping on a cold floor first thing in the morning. Also, the cold air blowing underneath your camper van can pull away the heat inside the van. If you’re in a snowy area, I’ve seen people pack snow against the side of the van to prevent this from happening.
If you’re spending most of your time in warm or temperate weather, however, you can save some cash and skip the van floor insulation. The choice is entirely yours.
For floor insulation, foam boards work best for van floor insulation but remember they will cut down on your headroom in an already small space.

Other Things To Consider When Doing Your Van Insulation
The obvious things to insulate permanently are your walls and ceiling. But don’t forget that your
windshield and other windows are BIG factors when it comes to heat transfer.
Anyone who lives in a warm or hot place knows the importance of putting up a reflective screen in the summer time, and of course the same concept applies to a van.
To fully insulate your vehicle you should be covering not just the windshield but all the windows. It’s easy and just take a little work to cut custom window coverings out of materials like Reflectix.
If you have a larger van, such as a Sprinter or Ford Transit, it is also worth considering building a partial wall to separate the cab from the cabin of your van. This of course costs money and adds weight, but if those aren’t of concern then you can add another wall of insulation and use thick blackout curtains to fill the doorway when you need to.
A black out curtain works well regardless of you having a partition or not and is a good thing to add to your van to create separation, insulation, and privacy in your vehicle.
Do you have fan’s or skylights installed in your van? Consider cutting out inserts made out of foam boards to shove in the fan during the winter. What good is ceiling insulation if you are going to have 14″x14″ gaps that the hot air can escape from?
Don't Forget The Heater
All this talk of van insulation is a mute point if you don’t have a source of heat.
Chinese Diesel Heater
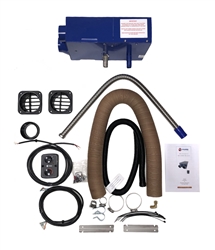
Diesel heaters seem to be all the rage right now. You don’t even have to have a diesel vehicle in order to imploy one of these bad boys.
The nice thing about about diesel heaters is they burn dry heat, which is nice to reduce moisture and humidity within the camper van. There are many different models out there but they all work on the same principles.
Propex Heatsource2000 (Propane)

The Propex Heatsource 2000 is a propane heating unit that is fairly simple to install. Propane burns “wet” but the nice thing about the heatsource 2000 is that it vents everything outside so you won’t have the condinsation issues you might otherwise have with other heater options.
The one bad thing is that it can be hard to find one. They are often sold out online but can be found at local custom van suppliers.
Mr. Buddy Heater (Propane)
Mr. Buddy heaters are very popular options. They now have an indoor safe model which, technically, should be safe to use in a van. We wouldn’t recommend any other version.
Also, since these don’t vent anything outside the van, the condensation of the wet burning propane might be a problem.
Pro’s are that it is cheap and easy to use (no installation required).
Final Thoughts On Van Insulation
In the end, how you do your camper van insulation is entirely up to your own wants and needs.
Most people don’t opt for a full on spray foam job despite its effectiveness and instead use a combination of materials.
By combining materials you can effective and affordably insulate your van to your heart’s content. The most effective insulation jobs cover the majority, if not all, of the ceiling, floor, and walls.
What you plan on doing and where you plan on staying in your van should act as your basic guide to insulation as well as the layout of your camper.
We hope this guide offers a good basis to provide you with the knowledge to go forward in your camper van build!
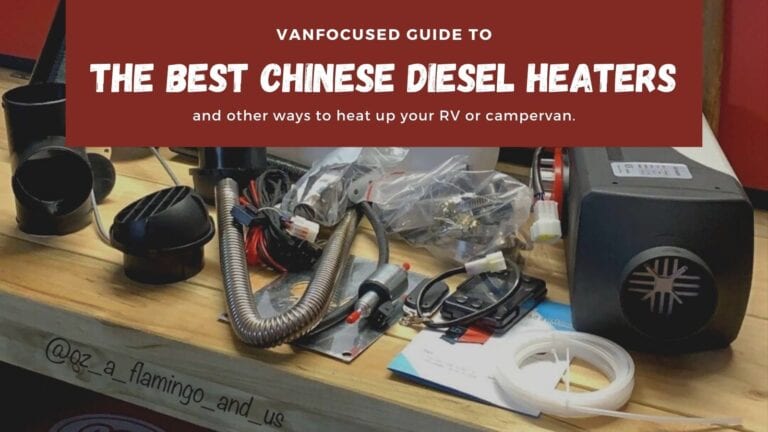
Now that you have your insulation done, you’ll have to keep your baby warm! Check out this post about those Chinese Diesel Heaters all the kids are talking about.


